15 Modern Summer Hairstyles 2026: Trendy & Fresh Hair Ideas for Every Length
Jenna Ortega’s Choppy Summer Lift

Shag crown volume happens at the roots, not the ends—this is the shortcut everyone misses. Blow-dry your damp hair against the natural growth pattern, pushing roots straight up and back for 20 seconds. You’re building a foundation. Once dry, take 2-inch sections from your crown and backcomb gently (not aggressively) at the base, then smooth the top layer over with your brush. Three sections. That’s it. The tousled texture does the real work for you, and honestly, day-two hair works better than freshly washed. You’ll find that soft, natural movement Jenna rocks at every beach appearance, and it requires zero heat styling.
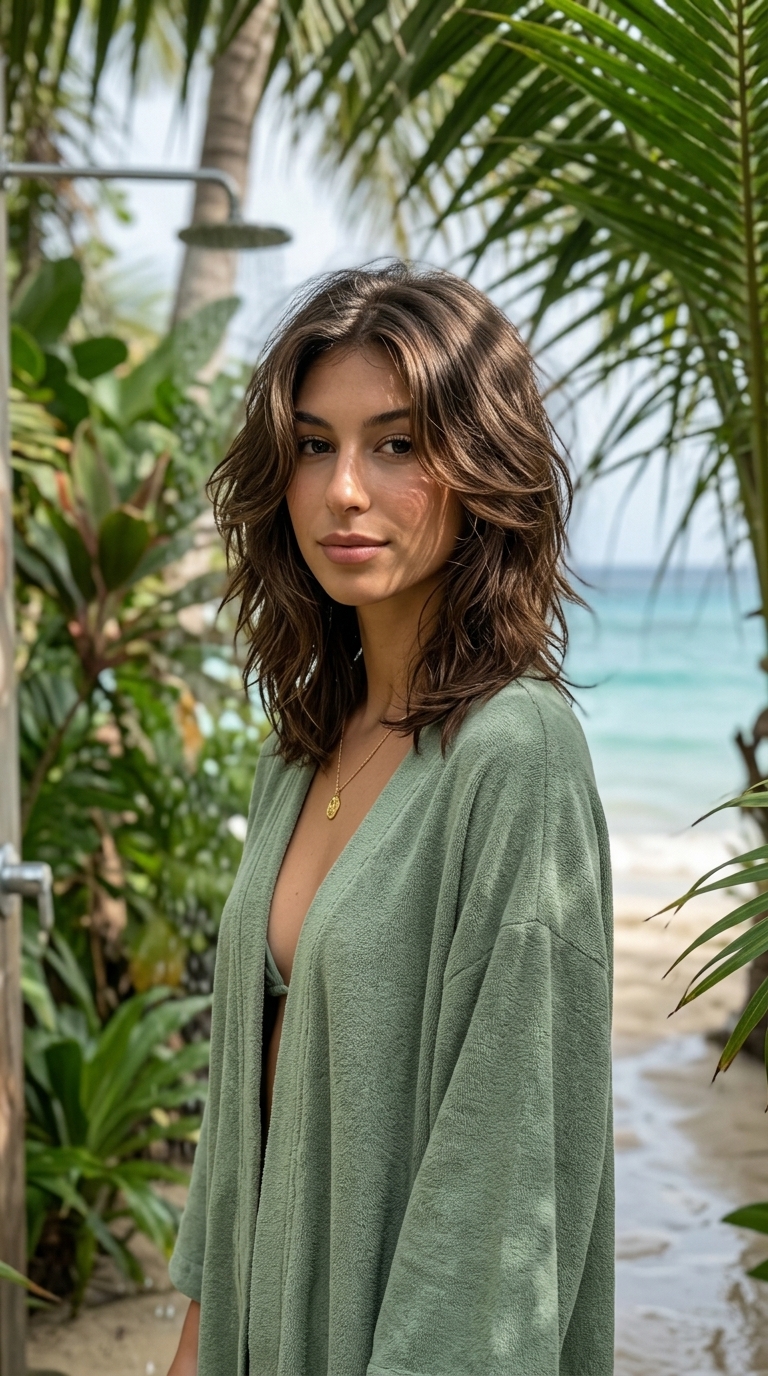
Rocky Cove Beach Waves Shag

The whole appeal of beach waves shag is that it looks like you didn’t try—and you mostly didn’t. Spray sea-salt texture mist into damp hair, scrunch it, then walk away and let it dry naturally for 45 minutes while you’re actually at the beach or doing something better. If you’re impatient, use a diffuser attachment on your dryer, moving it slowly through your hair without manipulating too much. The layers in a shag do the wave-making work themselves; your job is just to interrupt them with moisture and salt. By hour two, you’ll have soft, irregular waves that catch the light like Rihanna’s Fenty launch shag. No crimping, no brush—just texture and salt and time doing the job.
Clip-In Bangs Shag Hack

If you’re not ready to cut bangs but want the look, clip-in bangs styling gives you real flexibility—wear them to the pier, take them off at home. Start with a medium-length shag (8 to 10 inches at the longest point) that already has some texture and choppy layers built in. Blow-dry your hair smooth and flat, then section off a quarter-inch-thick horizontal line across your crown, from temple to temple. Clip the bangs in at the root (not floating on top of your hair—root placement is critical). Blend them by taking a medium curling iron and waving the bangs and your natural top layer together, curling away from your face for continuity. The bangs should disappear into your shag layers, not sit as a separate piece. Done right, nobody can tell they’re temporary, and you’ve got a full style transformation in under 5 minutes.
Polished Poolside Shag with Mini Claw Clip
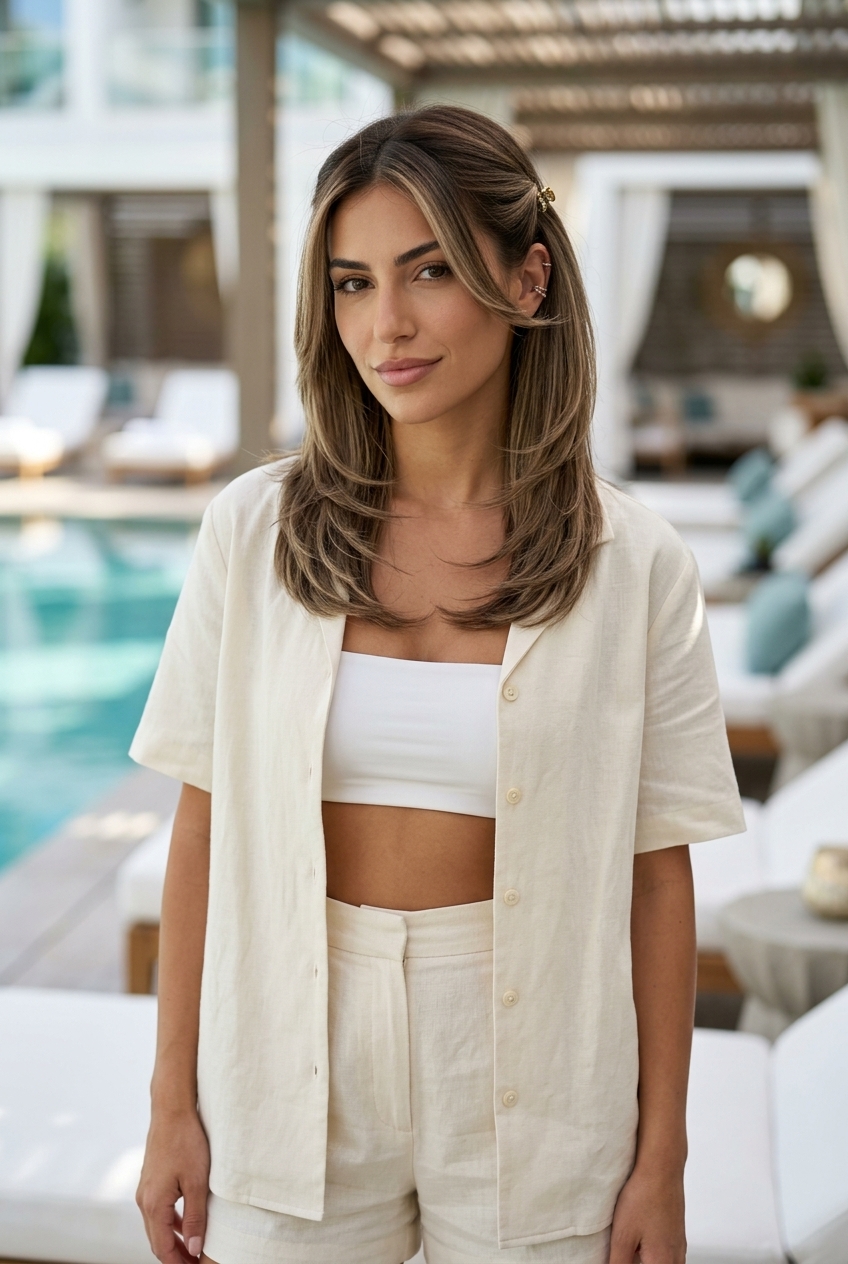
The trick to sleek shag styling at home is treating the crown and mid-lengths separately. Start with damp hair, blow-dry the roots straight using a round brush, then flip your head upside down for 10 seconds—this kills the flatness everyone worries about. Section off the top third and clip it away. Use a flat iron on medium heat through the underneath layers with a slight outward bend at the ends; this is where the movement lives. Unclip the crown, smooth it down with a few passes of the iron, and anchor one front section with a small claw clip at the side. The disorder comes from letting the underneath layers sit slightly higher than the top layer, creating intentional texture rather than one blunt line.
Refined Linen Brown Shag with Sculpted Crown

The crown is everything here. Blow-dry roots with a paddle brush, pushing the hair back and away from your face, then use a round brush at the very crown to build height. Once dry, run a flat iron through the sides and back with a gentle inward curve, creating a subtle frame without looking intentional about it. The bangs need their own moment: blow-dry them forward and slightly wet, then use the flat iron to slick them straight back against your head, holding for three seconds. This creates definition rather than frizz. A texturizing spray at the roots before styling keeps everything anchored through the day. For slicked back bangs styling, precision matters more than product—use a light hand and let the hair’s natural weight do the work.
Voluminous Curly Shag with Natural Definition

Curly hair demands curly shag styling that works with texture, not against it. Wash with a creamy conditioner and leave it in your hair while you comb through with a wide-tooth comb under running water. The key step: plop the hair in a t-shirt for 15 minutes while you do your makeup. Once you’re ready to style, apply a curl cream to soaking-wet hair, section by section, scrunching upward. Then air-dry or use a diffuser on your blow-dryer set to low heat and low speed, cupping sections and holding for 20 seconds. This builds curl definition without the crunch. The layers in your shag will create volume at the crown automatically; the disorder comes from letting some curls form tighter than others, which looks real rather than uniformly coiled. Deep condition weekly because layers create more surface area and curly hair drinks it up.
Understated Dock Shag: The No-Fuss Summer Cut

Minimalist shag styling means letting the cut do the work and the texture speak quietly. Blow-dry your damp hair with a brush in whatever direction feels natural—no fighting it. Once dry, run your fingers through the ends with a lightweight dry oil (think golden, not thick) to add separation without weight. That’s it. If you’re going somewhere, one light pass of a flat iron through the crown smooths frizz without removing the lived-in feel. The cut itself should have subtle layers throughout, so when you move, the hair shifts rather than staying locked. This works best on straight or slightly wavy hair with fine to medium density; anything thicker tends to bunch without some texturizing spray, which defeats the minimalist purpose.
Sleek Minimalist Shag with Silk Tie

Minimalist summer hairstyles don’t mean boring—they mean one focused detail. Smooth your shag back with a light hand cream or gel, then wrap a thin silk tie or scarf low at the nape. The layers remain visible and textured up top; the tie just anchors them. This works on straight or fine wavy hair because you’re not fighting the texture, you’re emphasizing the cut. The whole look takes five minutes and reads polished because restraint reads as confidence, which honestly beats overstyling every time.
Voluminous Shag with Heatless Curls Overnight

Heatless curls shag pairs best with medium-length or longer cuts where the layers have room to curve. Dampen hair before bed, wrap large sections around a foam roller or fabric rod, and sleep on it for seven to eight hours. The layers curl at different lengths, so you get natural dimension rather than uniform waves. This works on straight, wavy, or fine hair with existing shag layers. Deep condition twice weekly because the wrapping can tighten the curl, which dries ends faster than usual. Unwrap in the morning, finger-separate, and you’ll have volume that lasts until late afternoon without heat or product.
Old Hollywood Waves: Soft Romance with Pin Curls

Start with damp, detangled hair and apply a lightweight mousse to the roots for grip without crunch. Section your hair into four quadrants, then work with two-inch sections at a time. Wrap each section around a one-inch barrel curling iron, hold for eight seconds, then release onto a pin curl. Yes, actual pin curls—metal or plastic, doesn’t matter. Let them set while you finish the rest of your head. Once everything is pinned and completely cool, gently unwind each curl and finger-comb through for soft waves. The pin curl shag styling technique holds for three days without restyling, though you’ll want to refresh the bangs with the curling iron each morning. If you skip the pin curl step and just air-dry the curled sections, the waves collapse by evening.
Soft Romantic Shag: Face-Framing Waves for Summer

The wavy shag styling approach here skips heat tools entirely—instead, you’re setting the shape when hair is damp and letting time do the work. Apply a curl cream or wave cream to damp hair, focusing on mid-lengths and ends, then scrunch upward toward the roots to encourage texture. Brush it away from your face gently with your fingers and pin the front sections loosely away from your face with two claw clips. Sleep on it or let it air dry for four hours. When you unpin, you have soft waves that frame without looking styled. The layers catch the waves naturally, creating movement through the crown and around the face. This demands one trim every six weeks to keep the shape reading as intentional and not just grown-out. The trade-off: zero frizz if you use the right wave cream for your hair texture, and the waves survive humidity better than curled versions because they’re set into the hair structure, not just heat-formed.
Refined Linen Brown Shag with Sculpted Crown

A side braid woven through the front layers turns an ordinary shag into something with actual structure. Works best on medium-length layered hair with natural wave or texture—the kind that’s already a little messy. Twist a small section from your temple back toward your ear, then secure it with a tiny clip that matches your hair color. The braid doesn’t need to be tight or perfect; loose and undone reads better. Braided shag ideas like this one thrive on that organized-chaos vibe where one intentional detail makes the whole thing look deliberate instead of just bedhead.
Beachy Shag with Balayage Texture

Your hair doesn’t need a blow dryer for this one. Wash, apply a lightweight leave-in conditioner to damp hair, then scrunch upward as it dries. The layers do the work for you—each one catches differently, creating that multi-dimensional wave pattern that looks sun-bleached even without color. Walk around for 30 minutes. Better yet, sit by a window. The movement during air dry matters more than you’d think. If you want dimension without a salon visit, ask for a balayage when you eventually cut this shag, because natural waves show off lighter pieces in a way that flat hair can’t. For air dry shag styling, texture is your tool, and the cut determines how much texture you actually get.
Playful Summer Shag with Lifted Crown

The real trick to crown volume hair for shag that actually holds is understanding where gravity pulls hardest. Your crown is the one spot that can survive being teased a little without looking rough, so use a fine-tooth comb or a texturizing brush to gently backcomb the roots in small sections. Don’t go wild—just enough friction to catch the hair. Then smooth the top layer back down and mist with dry texture spray. Blow dry on high heat for 15 seconds straight up, then let it cool. That cool-down locks the volume in place. By day two, the texture has settled into something even better, more lived-in. This takes maybe 8 minutes once you’ve done it twice.
Ethereal Romantic Shag with Soft Waves

Soft, face-framing pieces define this version—think Florence Welch’s bohemian waves, but shorter and sharper. Ask for longer bangs on your next cut, ones that hit below your cheekbone and taper at the ends. Blow-dry those pieces separately from the rest, curling them slightly inward with a round brush. The rest of the shag gets a quick pass with a texture spray and your hands. Romantic shag styling depends on movement rather than polish, so slight messiness reads as intentional, not careless. Refresh the texture every other day by spritzing damp roots, scrunching, and either air-drying or using a diffuser attachment. The bangs soften your face and the layers keep everything from feeling heavy or costume-like on a shoulder-length frame.
Still Deciding? Here’s a Quick Comparison
| Hairstyle | Difficulty | Maintenance | Best Face Shapes | Pros | Cons | |
|---|---|---|---|---|---|---|
| Classic & Clean | ||||||
|
5. Versatile Clip-In Bangs for a Textured Shag | Easy | Low — trim every 8 weeks | all | Low maintenanceEasy to style at homeWorks on multiple textures | Not ideal for very curly hair |
|
6. Sleek Shag with Mini Claw Clip | Moderate | Low — trim every 8 weeks | oval, square, diamond | Low maintenanceSuits most face shapesWorks on multiple textures | Not ideal for very curly hair |
|
8. The Sculpted Linen Shag | Easy | Low — every 8-10 weeks | oval, long, heart | Low maintenanceEasy to style at homeSuits most face shapes | Not ideal for very curly hair |
|
10. The Minimalist Flow Shag | Easy | Low — every 10-12 weeks | all | Low maintenanceEasy to style at homeWorks on multiple textures | Not ideal for very curly hair |
|
14. The Chic Shag Scarf Wrap | Easy | Low — trim every 8 weeks | oval, long, heart | Low maintenanceEasy to style at homeSuits most face shapes | Not ideal for very curly hair |
|
21. The Boho Braided Nape Shag | Easy | Low — trim every 8 weeks | all | Low maintenanceEasy to style at homeWorks on multiple textures | Not ideal for very curly hair |
|
24. The Gravity-Defying Crown Volume Shag | Moderate | Medium — trim every 5-6 weeks | oval, long, heart | Suits most face shapesWorks on multiple textures | Not ideal for very curly hair |
|
25. The Summer Sun-Kissed Shag | Moderate | Low — trim every 8 weeks | oval, long, heart | Low maintenanceSuits most face shapesWorks on multiple textures | Not ideal for very curly hair |
| Soft & Romantic | ||||||
|
2. Tousled Shag with Crown Volume | Easy | Low — trim every 8 weeks | all | Low maintenanceEasy to style at homeWorks on multiple textures | Not ideal for very curly hair |
|
4. Effortless Beach Waves for a Natural Shag | Easy | Low — trim every 8 weeks | oval, long, heart | Low maintenanceEasy to style at homeSuits most face shapes | Not ideal for very curly hair |
|
9. The Defined Curly Shag | Moderate | Low — trim every 8 weeks | All face shapes | Low maintenanceSuits most face shapes | Not ideal for fine hair |
|
15. Voluminous Shag with Heatless Curls | Moderate | Medium — trim every 5-6 weeks | round, oval, heart | Suits most face shapesWorks on multiple textures | Not ideal for very curly hair |
|
18. The Romantic Shag Pin-Curled Accent | Moderate | Medium — trim every 5-6 weeks | oval, heart, diamond | Suits most face shapesWorks on multiple textures | Not ideal for very curly hair |
|
20. Soft Wavy Tendrils & Crown Volume for a Shag | Moderate | Low — trim every 8 weeks | round, square, oval | Low maintenanceSuits most face shapesWorks on multiple textures | Not ideal for very curly hair |
|
23. Air-Dried Tousled Shag Waves | Easy | Low — trim every 8 weeks | oval, heart, long | Low maintenanceEasy to style at homeSuits most face shapes | Not ideal for very curly hair |
Frequently Asked Questions
What’s the easiest way to get natural-looking shag waves for summer?
Skip the heat entirely. The Effortless Beach Waves for a Natural Shag relies on sea salt spray, scrunching damp hair, and air-drying—no tools required. This works best on day-2 or day-3 hair, which already has texture to grip the spray and hold the wave pattern without stiffness.
Can I try bangs with my shag without committing to a permanent cut?
Absolutely. The Versatile Clip-In Bangs for a Textured Shag gives you instant fringe without scissors. The trick is blending them seamlessly with your existing layers using a low-heat curling tool—aim for the same texture and wave pattern so the bangs don’t look like a separate piece.
How can I maximize crown volume in my shag without teasing or heavy products?
Try the Tousled Shag with Crown Volume method: blow-dry your roots upside down with a diffuser attachment while applying Color Wow Xtra Large Bombshell Volumizer to damp hair. The mousse is lightweight and non-sticky, so it lifts without weighing down the layers or creating that crunchy, over-styled look.
What products are essential for maintaining a piecey, defined shag look?
For separation and hold, you need two things: a texturizing spray (Oribe Dry Texturizing Spray is the standard) and a lightweight styling wax or pomade. Apply the spray first for grip, then use the wax on individual pieces—especially important for styles like the Edgy Piecey Shag and Piecey Fringe & Tousled Crown on a Short Shag , where definition matters more than flow.
Final Thoughts
The modern summer shag hairstyle 2026 isn’t about perfection—it’s about looking like you didn’t try, which, ironically, requires trying. The good news: once you nail one technique (diffuser blow-dry, texturizing spray, or clip-in bangs), the rest feels like variations on a theme you’ve already mastered.