
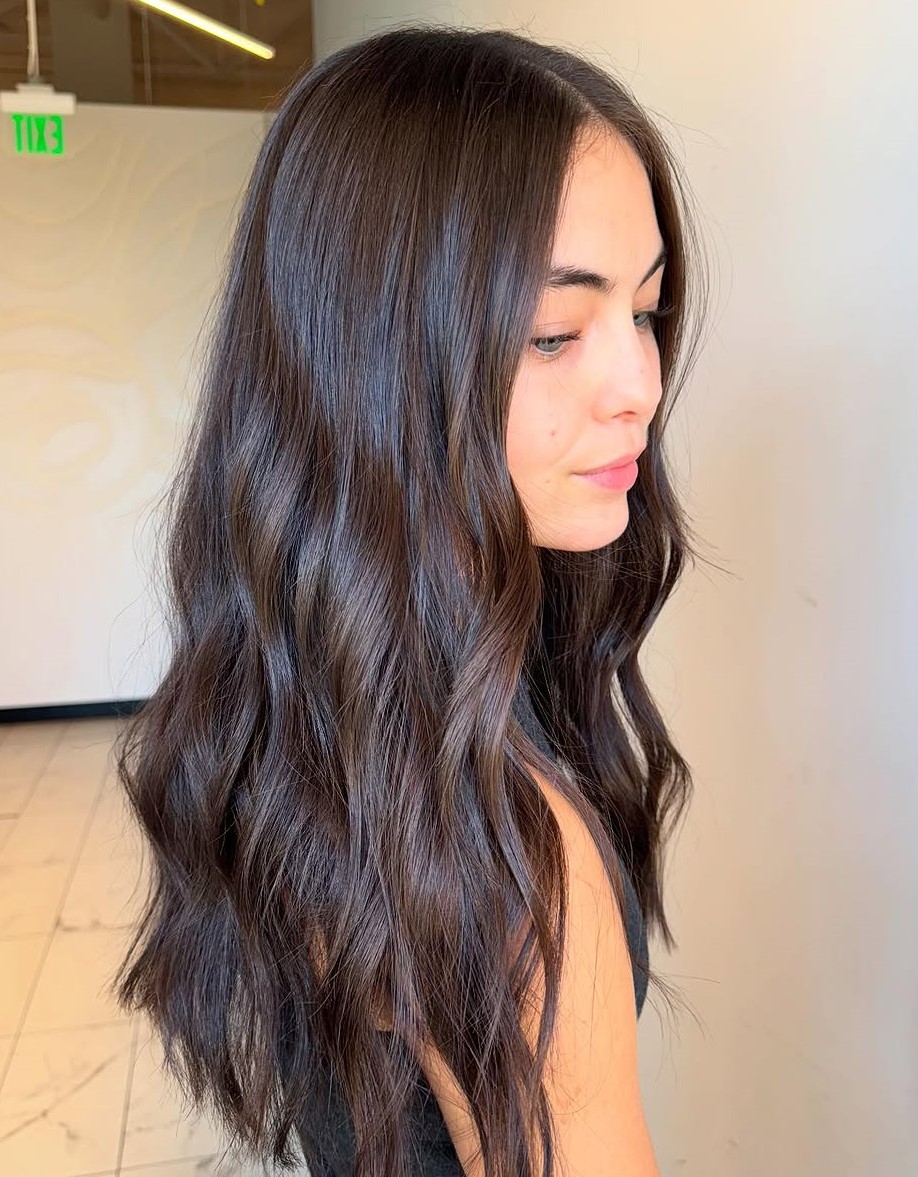
I noticed something in the chair next to mine last month. Every second client was asking for a deep brown with no red, no brass, just a dark, quiet finish. I used to think espresso was a boring choice. Now I see the point: it reads expensive because it says nothing at all.
This piece covers 29 versions of Espresso Brown Hair, from a five-minute blunt bob to a layered blowout that begs for a round brush. Some suit fine hair that goes flat by 4 p.m. Others need thickness and patience. I tested the ones that work on real weeks, not just the first wash. The grow-out is where most browns fail. These don’t.
Solid Espresso Blunt Bob
A blunt bob is the rare cut that reads sharper on a round face than a square one — geometry that just works. With solid espresso brown across every strand, the shine takes over. No highlights, no lowlights, just that deep, nearly-black tone hitting the jaw. The blunt line forces the eye across, not down. Straight, thick texture carries the weight best. Fine hair? The ends will look thinner by week three.
Piecey Pixie with Espresso Undertones
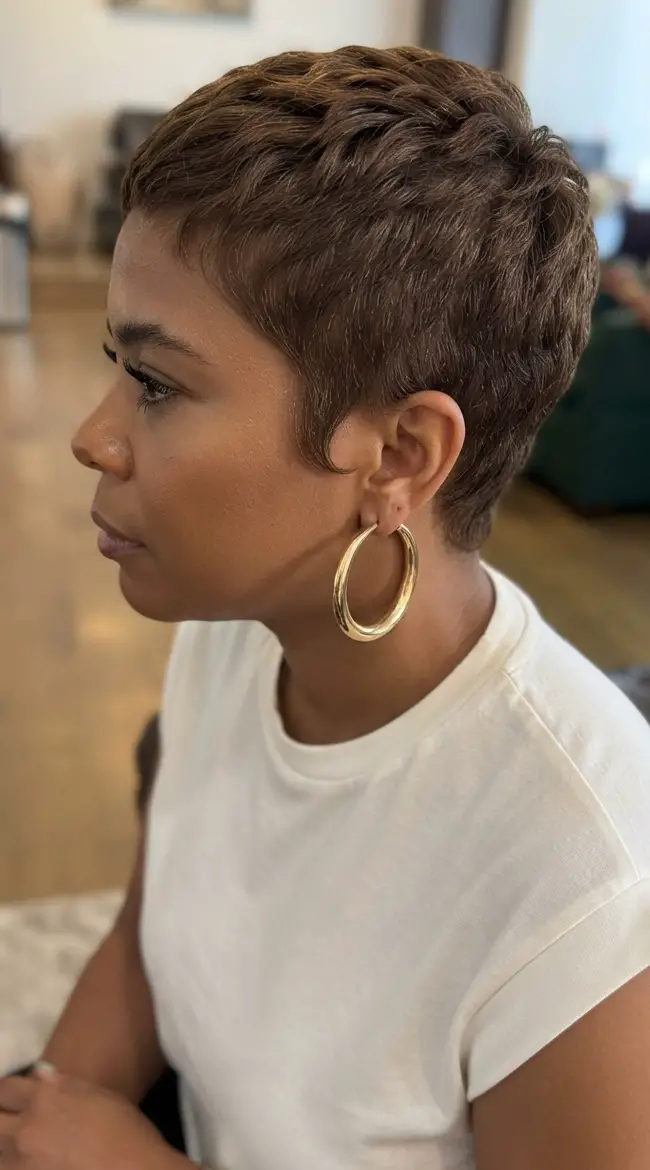
Want a brown that does not scream darkness but still reads serious? The piecey pixie relies on a light brown base, then espresso undertones woven in as a toner — not a full dye. The colour lands somewhere between a shadow root and an afterthought. That side part and fine texture let those deeper bits flick through at every angle. Neutral tone, so no brassy surprise at week four.
Chin Deep Espresso Blunt Bob
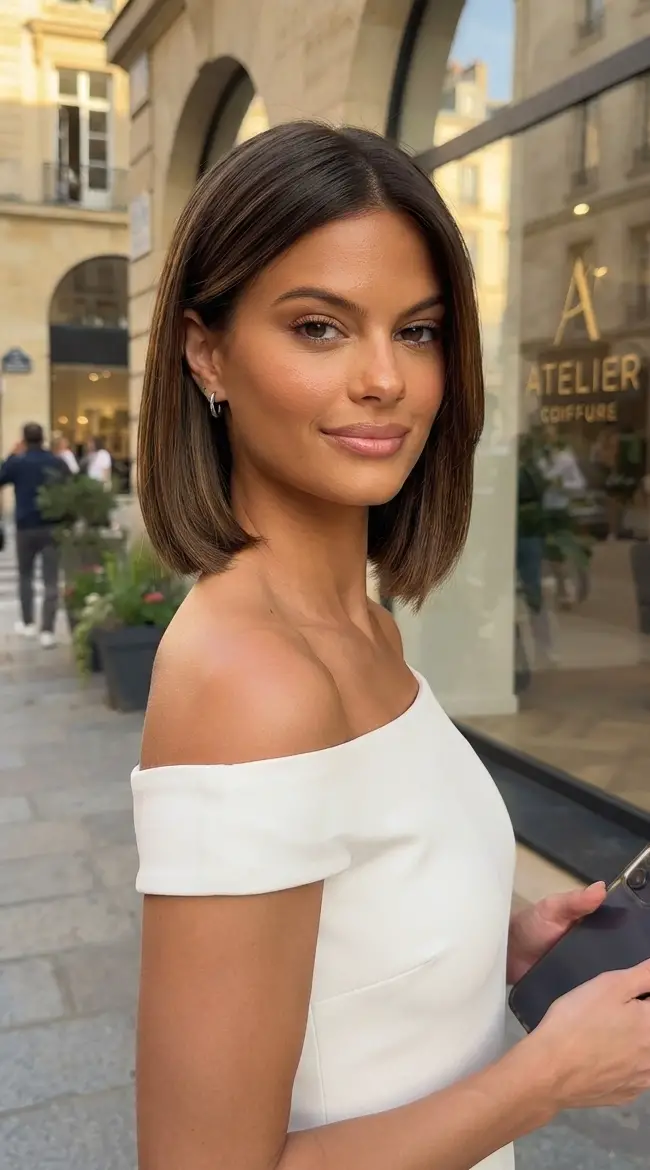
Multi-dimensional espresso gets all the praise, but I will take the solid version. It is louder. No subtlety, just one deep note hitting the jaw like a period. The deep espresso blunt bob works because it refuses to soften anything. For thick, straight hair, this is the colour that makes you look put together in dry shampoo. Tell your stylist: all-over solid espresso brown, no ribbons, no shadows, clean line at the chin. That is the whole conversation.
Sleek Espresso Lob With Inward Curl
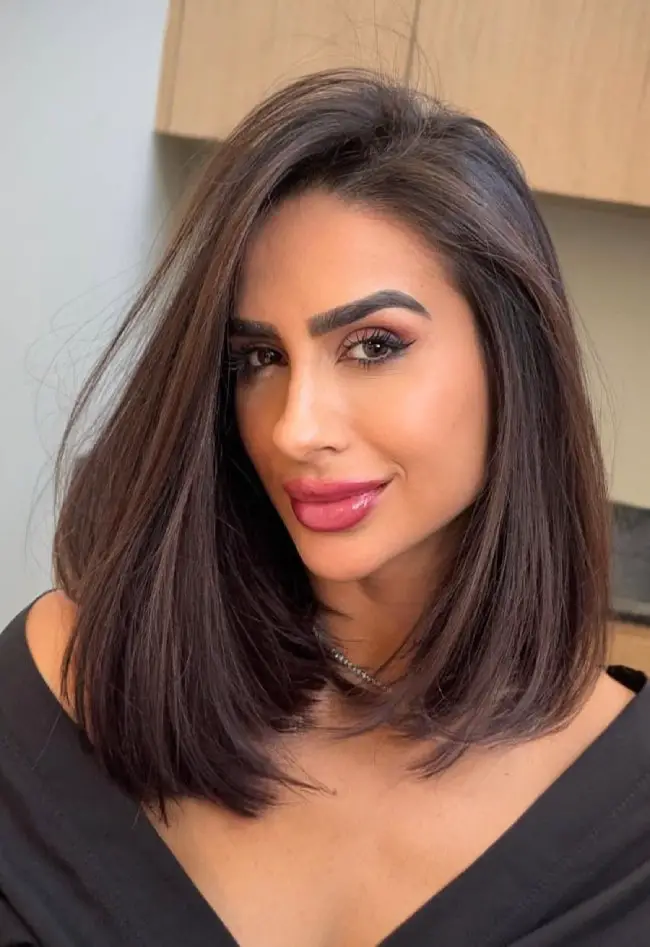
I will confess: I expected the inward curl to collapse by noon. It held. The trick is the collarbone length — short enough that the bend stays defined, long enough to tuck behind an ear. The espresso lob with inward curl demands a blowout every time. That sleek lob does not tolerate day-two air drying.
Straight fine to medium texture actually locks the curve. Trims every six weeks keep the ends from flipping outward. Between washes, dry shampoo at the roots and a flat iron pass on the underlayer.
Sleek Espresso Lob With Soft Layers
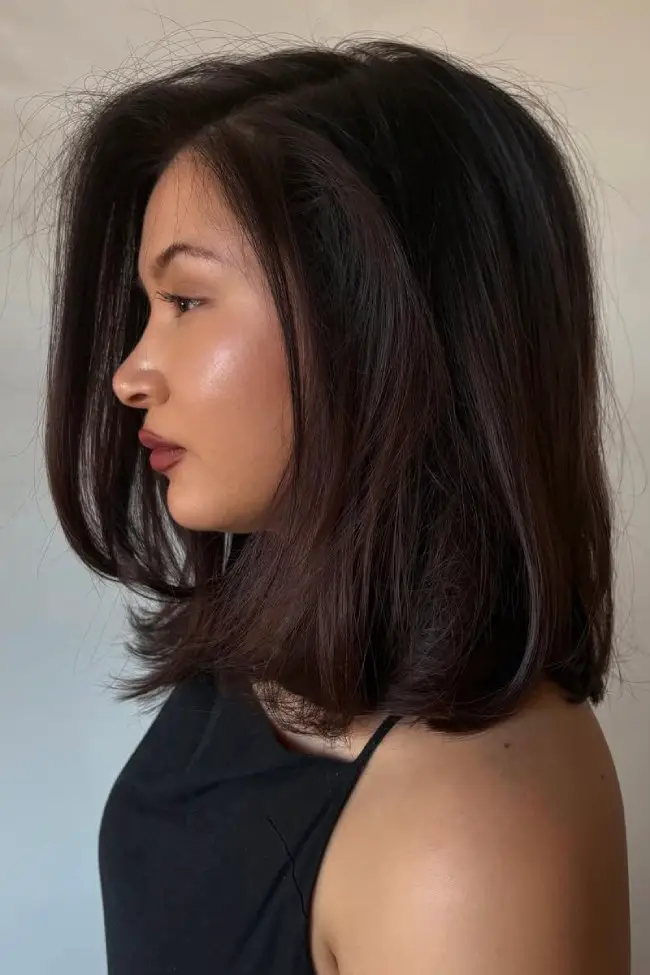
Thick straight hair is not a problem for most cuts so much as an opportunity. The espresso lob soft layers take that density and stack it at the shoulder without the dreaded triangle shape. Soft layers remove bulk from the interior, not the perimeter, so the sleek shoulder lob still hangs heavy at the ends. Colour stays solid espresso brown — no dimension to distract from the weight.
Who suits it? Anyone with medium to thick density who wants movement without losing visual thickness. Fine hair will look sparse through the layered crown by week two. Middle part, side part — both work as long as you commit to blowdrying the layers outward. Let them air dry and they will clump into a single sad wedge.
Espresso Long Bob With Face-Framing
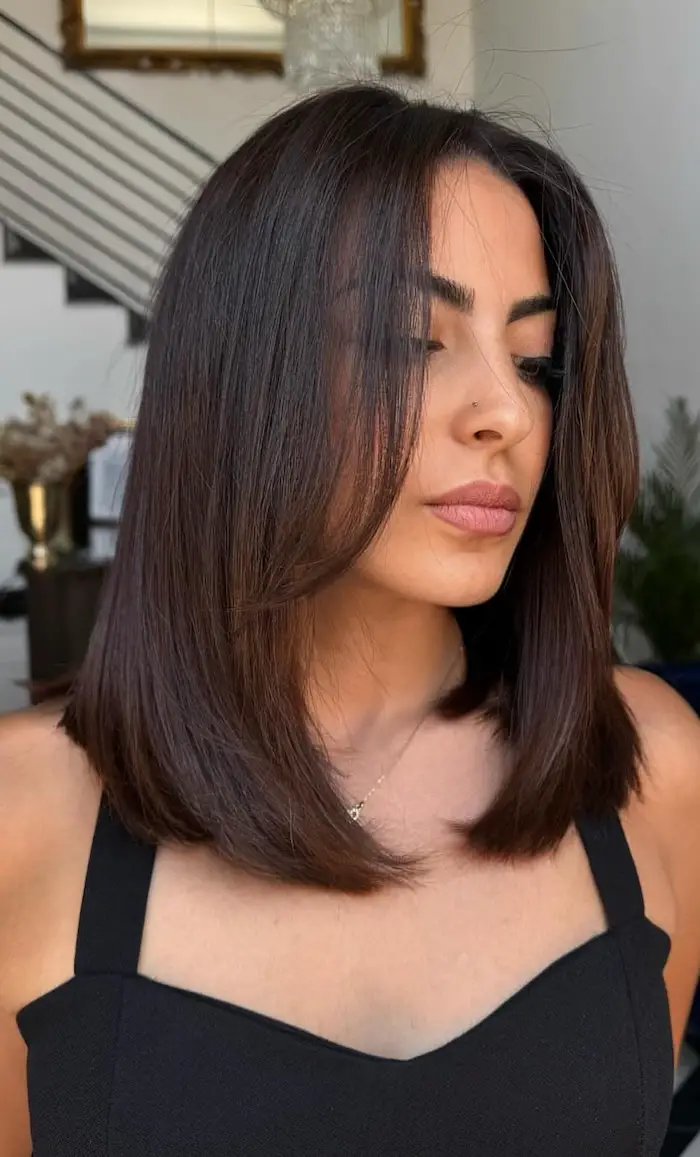
I keep coming back to this cut around April. The espresso long bob face-framing sits at collarbone with a side part, and the front pieces hit right below the chin — short enough to feel light, long enough to still pull back. Straight, medium-thick hair holds those face-framing layers best; the inward curl at the ends needs a round brush and about ten minutes of patience. What gets me every time is how the solid espresso shade reads almost metallic in spring light.
This is the cut I suggest when someone wants a lob but doesn’t want to fight their hair every morning. The layers skim the jaw without hollowing it out, and the shade stays glossy for weeks. It is not a sit-in-the-chair-and-walk-out look. You need a blow-dryer, a round brush and a plan for those ends.
Espresso Layers With Curtain Bangs
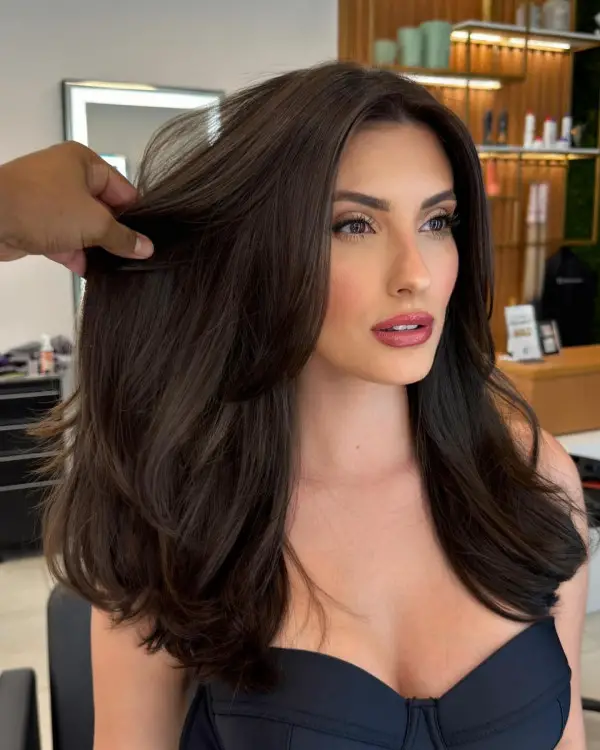
Who told you curtain bangs are low-maintenance? They are not, and I mean that with affection. The espresso layers curtain bangs start at collarbone with a middle part, and the curtain bangs sweep to the cheekbones while the layers underneath give the ends movement. On thick, naturally wavy hair, this structure actually holds its shape past noon — the volume stays at the roots because the layers remove weight properly.
To build this, the stylist cuts the bangs dry at an angle so they soften the face without a hard line, then works the layers down through the back. I watch this happen and always think it looks simple. Then I try it in a bathroom mirror and remember why I pay someone.
Glossy Espresso Shoulder Length Waves
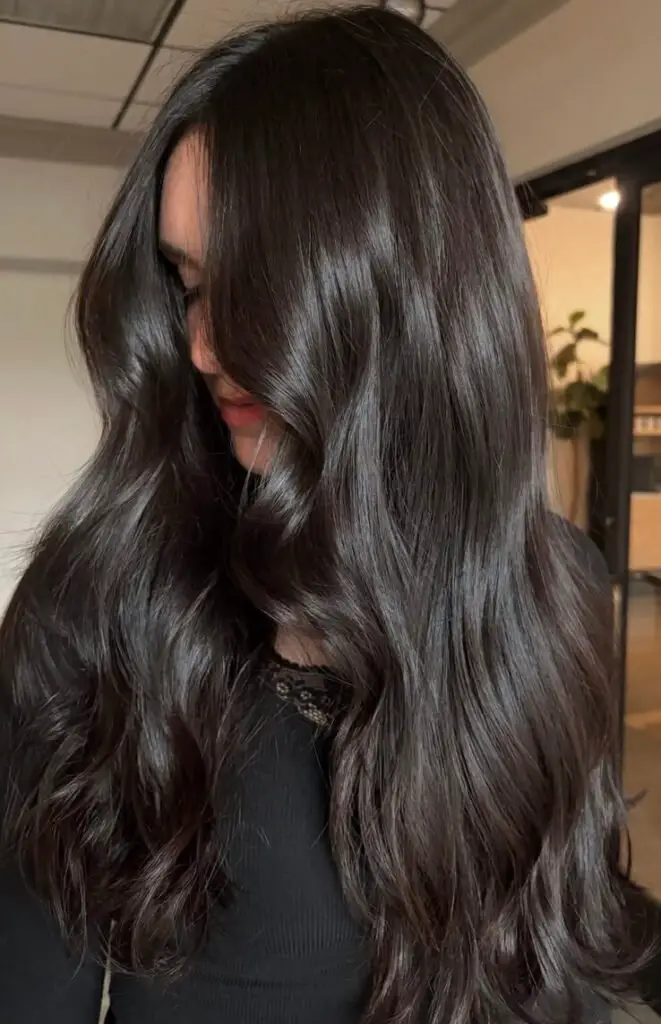
I will say it: I chased a high gloss finish for years and ended up with a muddy, flat brown every time. The glossy espresso shoulder waves I finally got started with a two-step process — first a deep espresso base, then a clear gloss overlay that seals the cuticle. The colour lands at shoulder length with side-swept bangs, and the waves are subtle, about a one-inch barrel, soft enough to run your fingers through.
On medium-density wavy hair, the shine lasts about three washes before it starts to dull. I use a rinse-out treatment instead of another gloss appointment, which buys me another week. The upkeep on this colour is trim every eight weeks and a toning refresh around week twelve, because the clear gloss fades before the base does.
Wavy Espresso Collarbone With Side Bangs
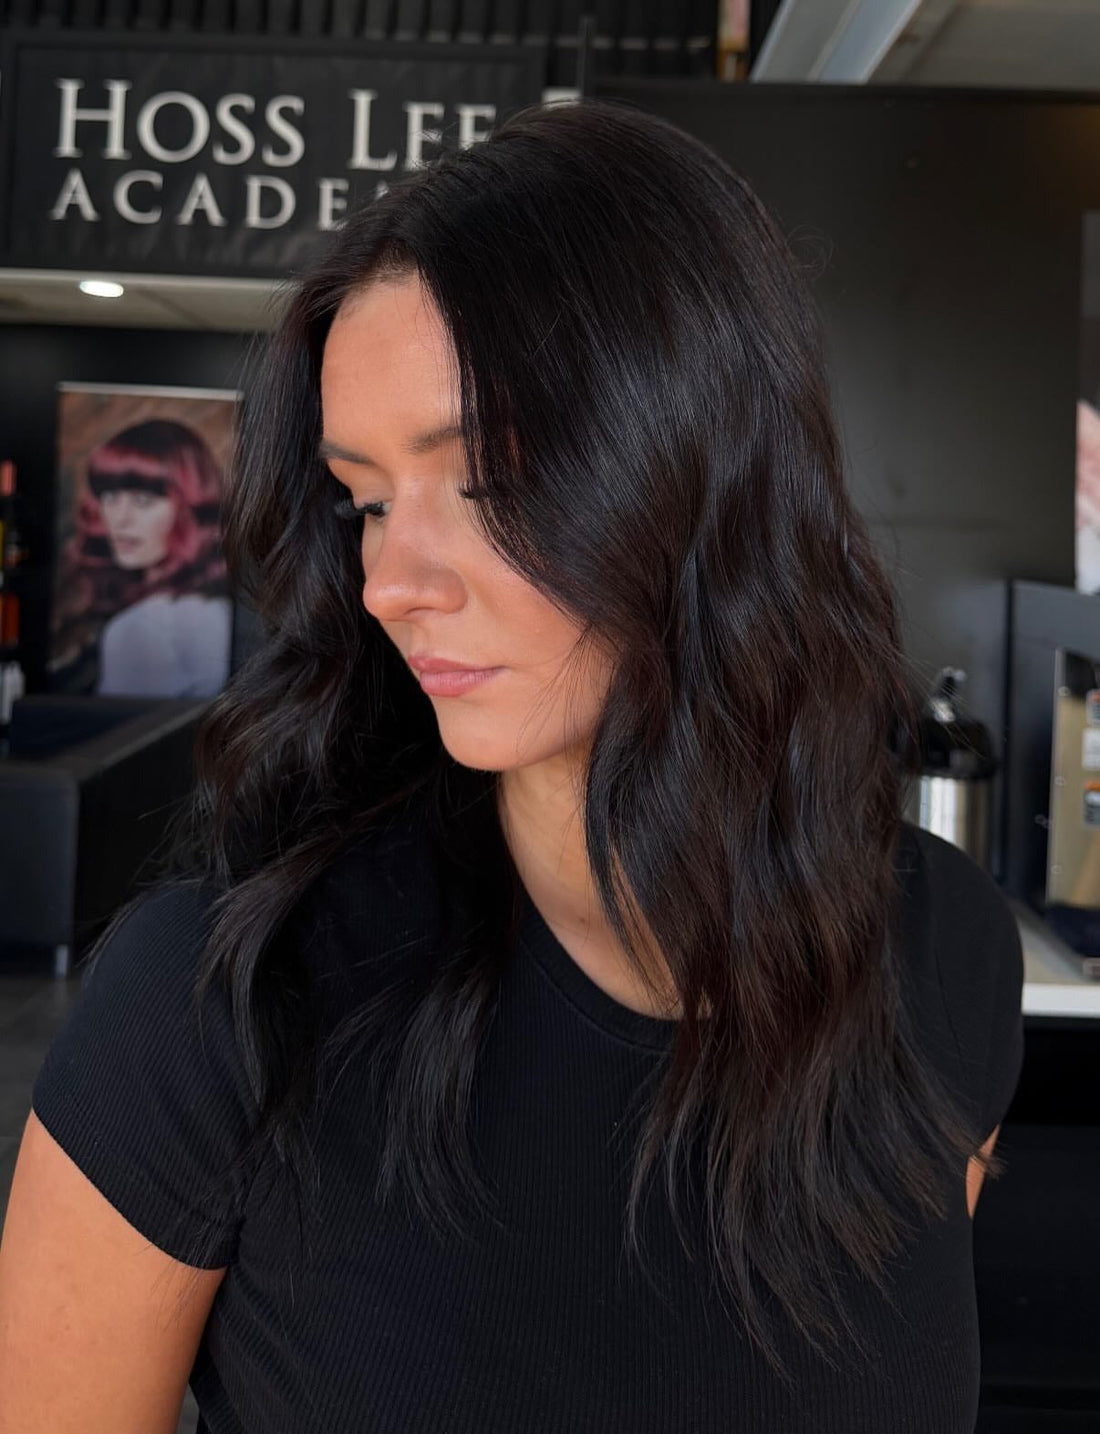
Book this, do not try it at home. The wavy espresso side bangs start at collarbone with a side part, and those side-swept bangs need a professional hand — the angle has to connect to the layers without creating a Chucky bang curtain. The solid espresso is a single-process application, no dimension needed, which sounds simple until you try to get that depth without going black.
Thick, wavy hair takes the colour well because the texture holds the pigment evenly. The stylist applies the colour section by section, not glop-and-hope, because the fine pieces around the part grab faster. I sat through this three hours and understood why my box dye always pulled blue at the roots.
Espresso Lob With Auburn Undertones
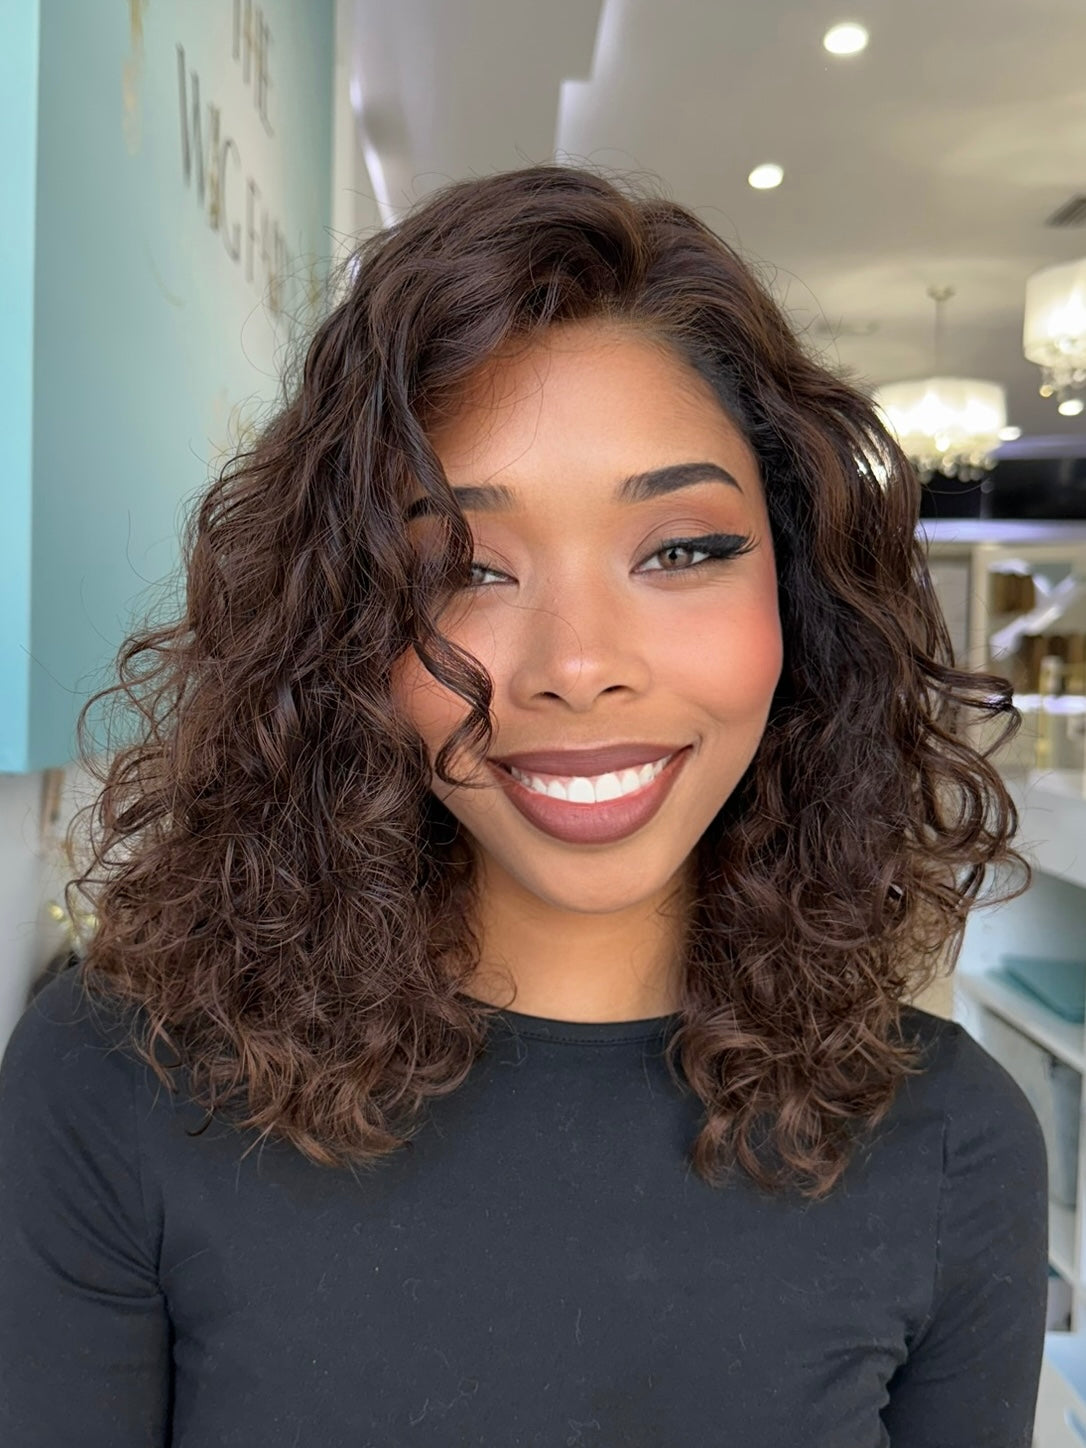
The espresso lob auburn undertones work best on curly hair with fine to medium density because the auburn catches light in the coils without overwhelming them. But here is the catch: those auburn undertones fade fast on curls. I have seen it go brassy in four weeks, and the warm tint leans orange, not red, on porous hair. The lob itself is shoulder-length with wispy bangs and a middle part, and the cut relies on the natural curl pattern for shape — no heat needed. If your curls drink colour, ask your stylist for a demi-permanent red base underneath the espresso. That buys you two more weeks before the tone shifts.
Mid-Back Long Espresso Layers With Curtain Bangs
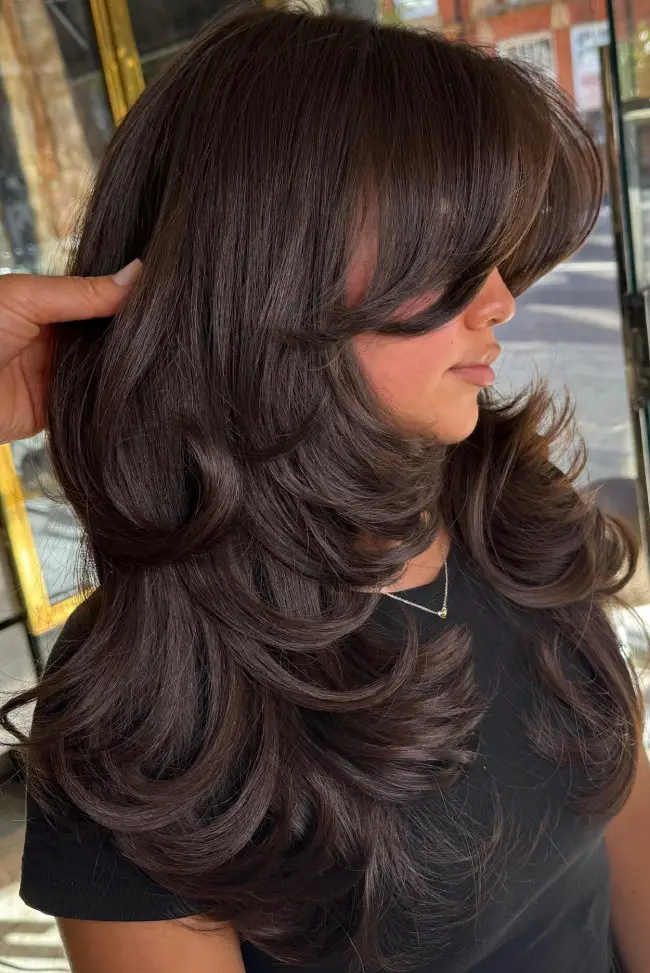
Ever had those face-framing pieces that look effortless in the salon photo but turn into a daily negotiation by week two? The long espresso layers here start below the chin and cascade to mid-back. The curtain bangs part in the middle and sweep outward. Colour is a solid espresso brown with a warm tone, applied evenly. The natural texture is wavy and thick, which gives the layers lift.
But here’s the wear and tear. Those face-framing pieces demand a round brush blowout every time. On humid days, they curl in opposite directions. The length needs a trim every 8-10 weeks, the bangs every 4-6. If you’re an air-dry person, expect them to fall flat against your cheeks. The grow-out is graceful, but the styling is not.
Espresso Layers With Soft Waves
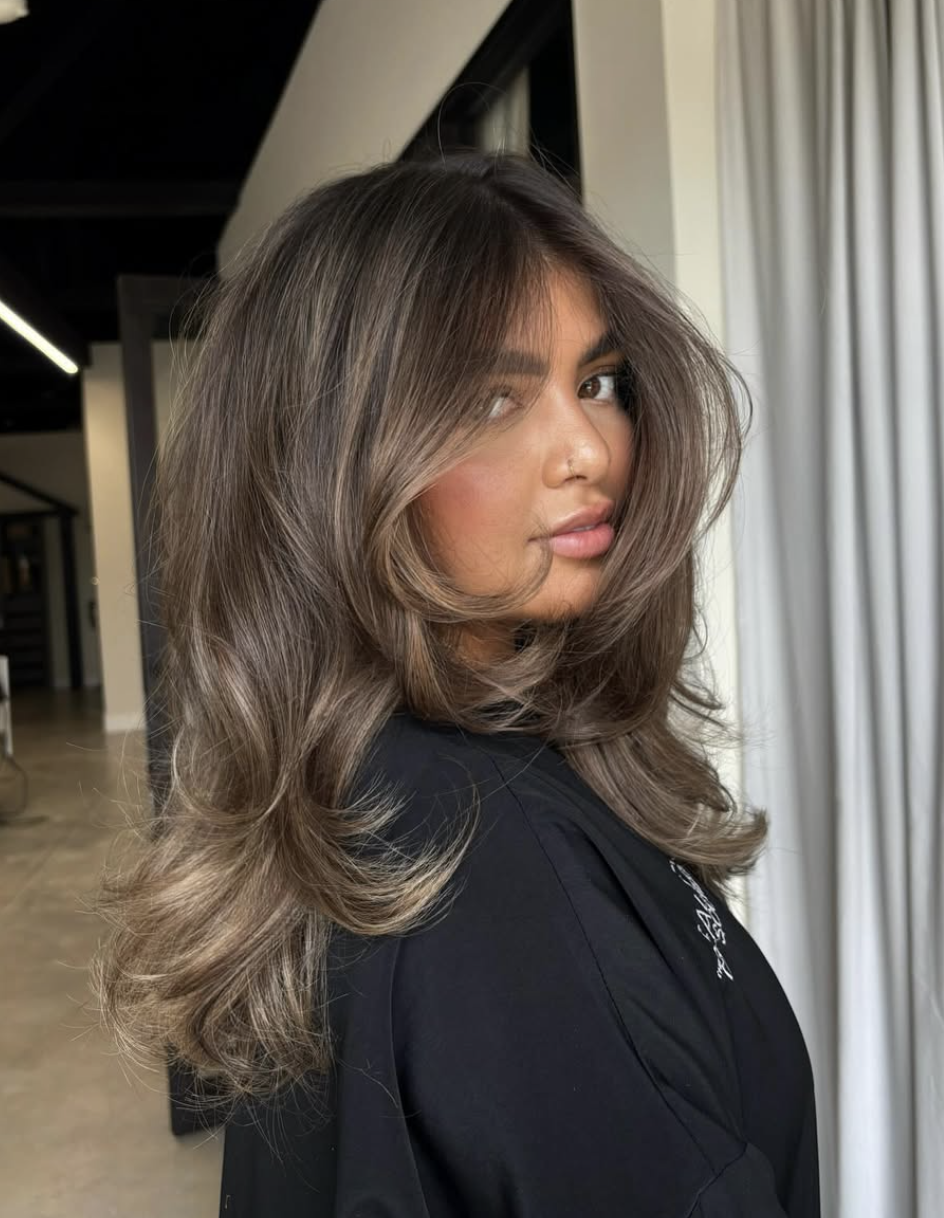
The combination of espresso layers soft waves and lighter brown highlights creates movement without going too light. The colour technique involves painting thin highlights around the face and through the ends. The base stays dark, the tone stays warm. Length hits the collarbone, texture is wavy with medium density.
To style: blow-dry roots up with a round brush for volume. Then wrap sections around a 1-inch barrel, alternating directions. A spritz of texturizing spray separates the waves. It takes about 20 minutes, and it holds without hairspray.
Espresso Balayage Mid-Back Waves
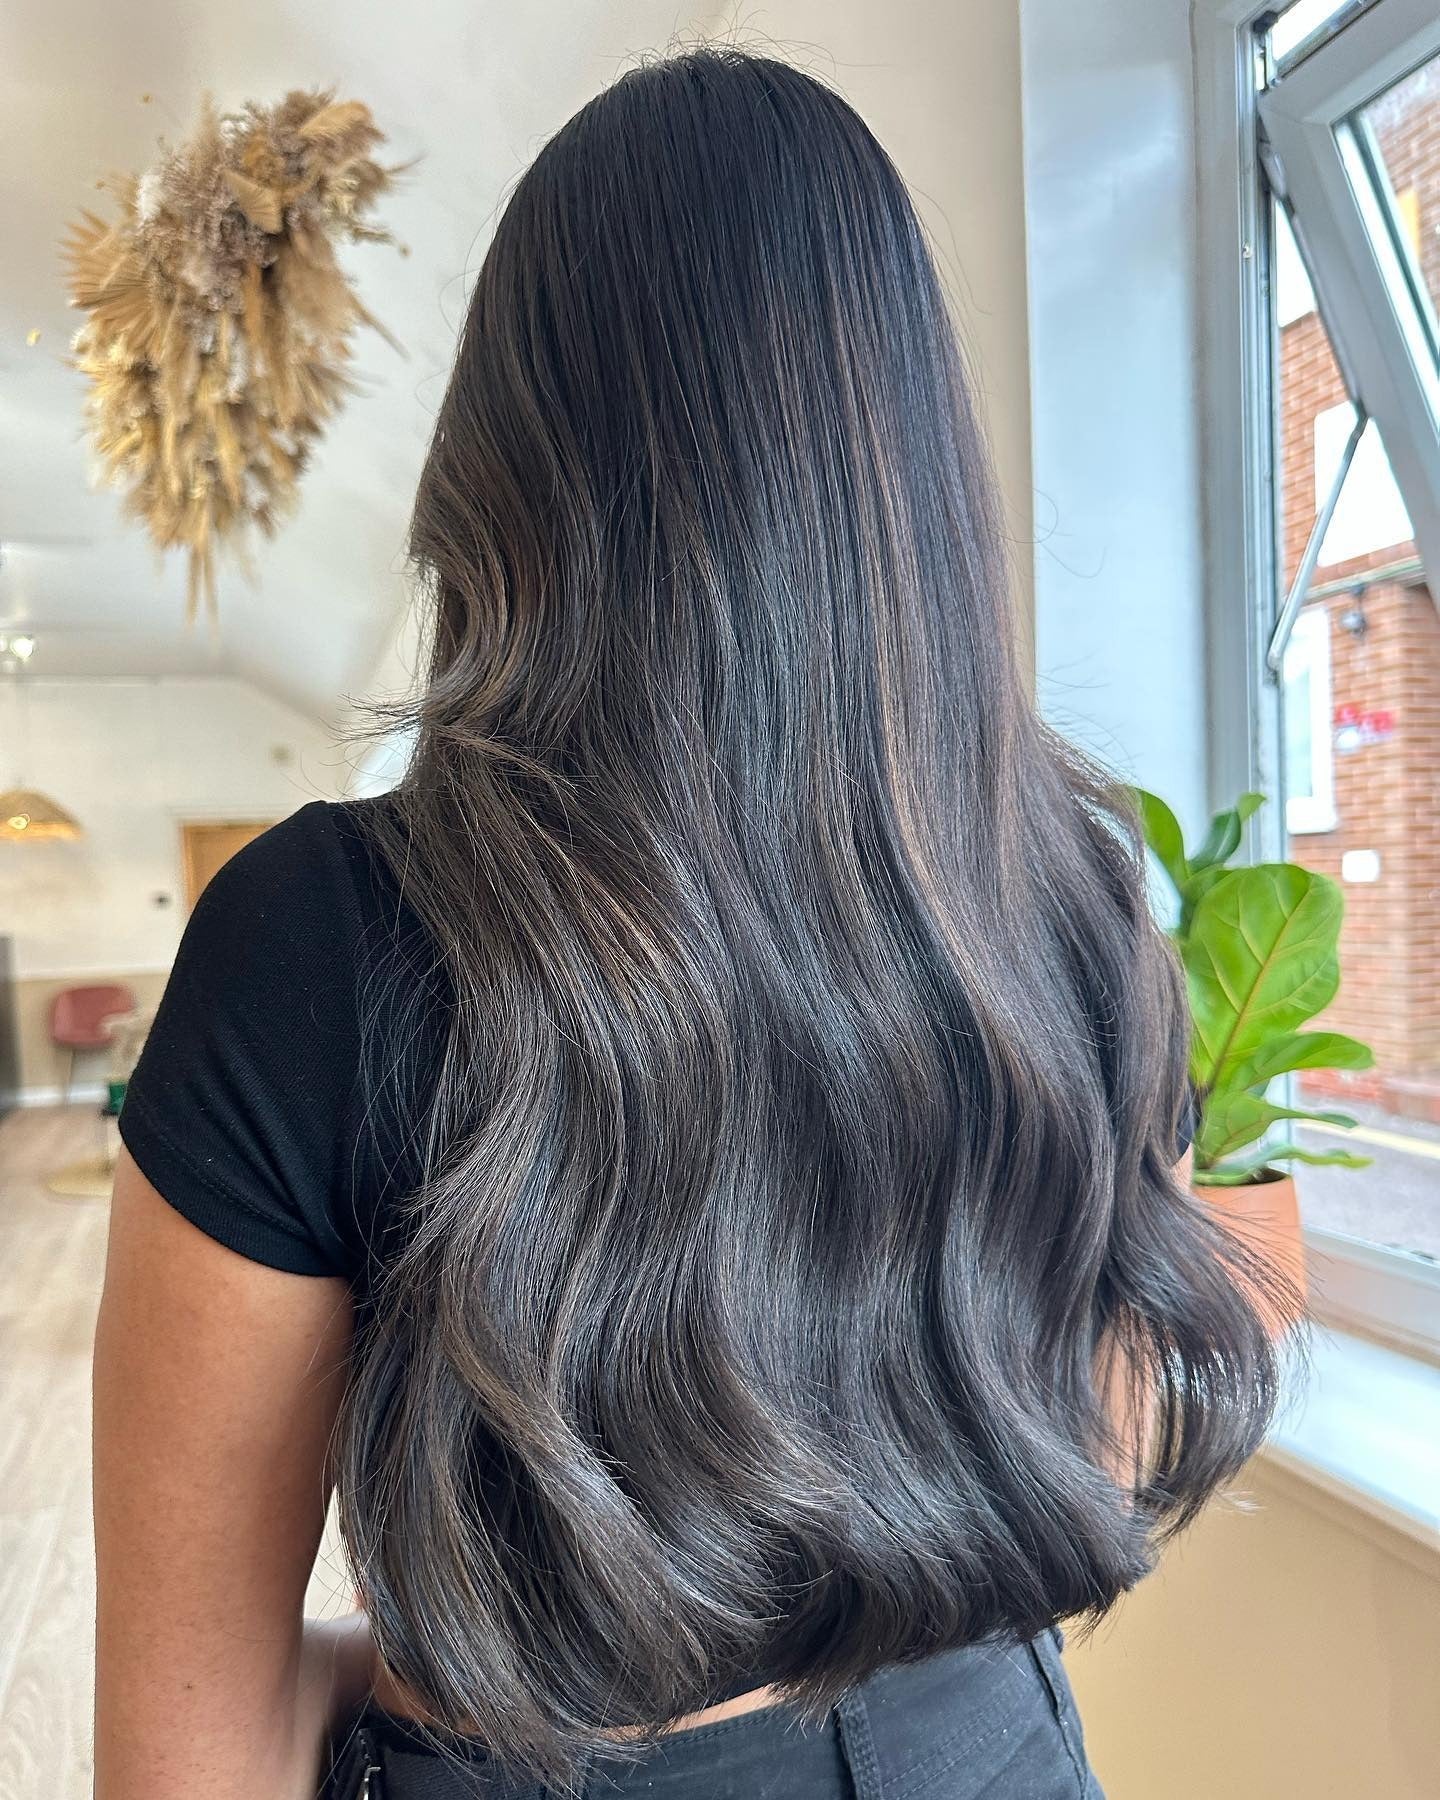
Verdict: the espresso balayage mid-back waves are gorgeous on day one. Question is what happens by week eight. The base is a rich dark brown, with balayage highlights painted on from mid-length to ends. The tone is warm, the length is mid-back, and the natural texture is wavy and thick. The technique gives subtle dimension without a clear root line.
But balayage on dark bases doesn’t fade gracefully. The lighter brown pieces start to look brassy around week six. A toning gloss every four weeks can help, but that’s extra salon time. Trims every 8-10 weeks keep the ends healthy. Touch-ups every 3-4 months, or the dimension disappears. It’s not as ‘low maintenance’ as the internet says.
Espresso Waves With Cool Highlights
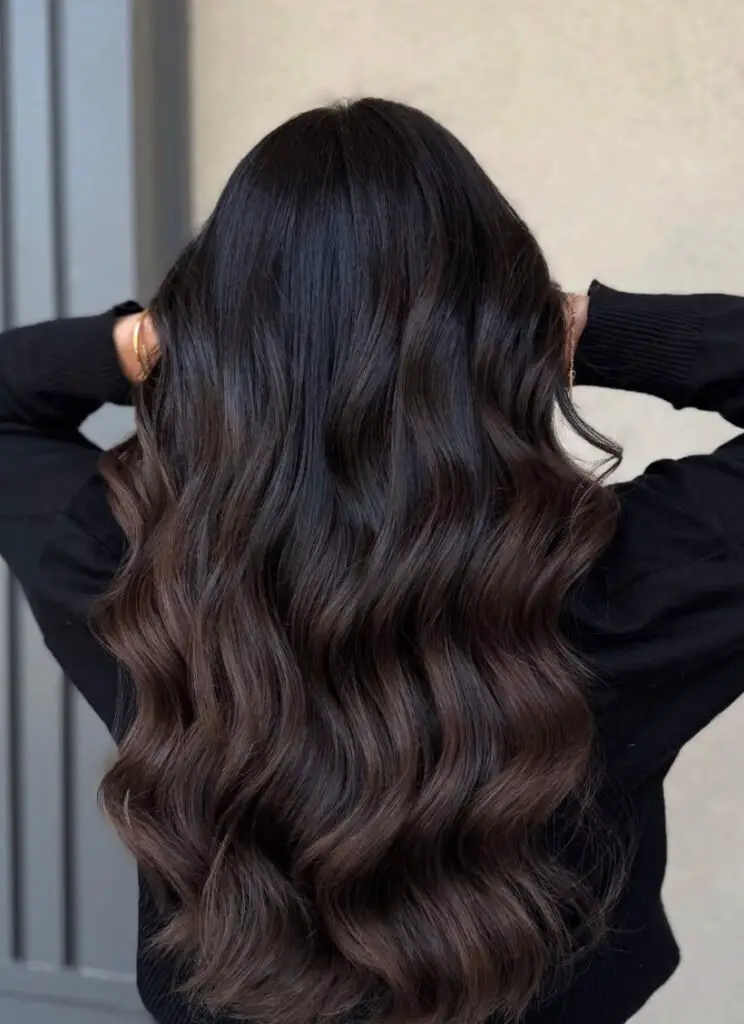
Cool-toned highlights on espresso brown are a specific gamble: they work when your skin has pink or neutral undertones, but they can wash out warm complexions. The espresso waves cool highlights here are built with a cool-toned espresso base and fine ash-toned highlights. The tone leans cool, not warm. Length is mid-back, texture is wavy and thick. The highlights are subtle enough that they don’t scream ‘frosted.’
Who they suit: people with cool or neutral undertones. On warm skin, the highlights can look grey. Also works well on grey or silver hair transitions because the ash tone blends. If your hair is very warm naturally, skip this — it will fight your base. The dimensional espresso cool highlights read as intentional, not brassy.
Mid-Back Dimensional Espresso With Cool Highlights
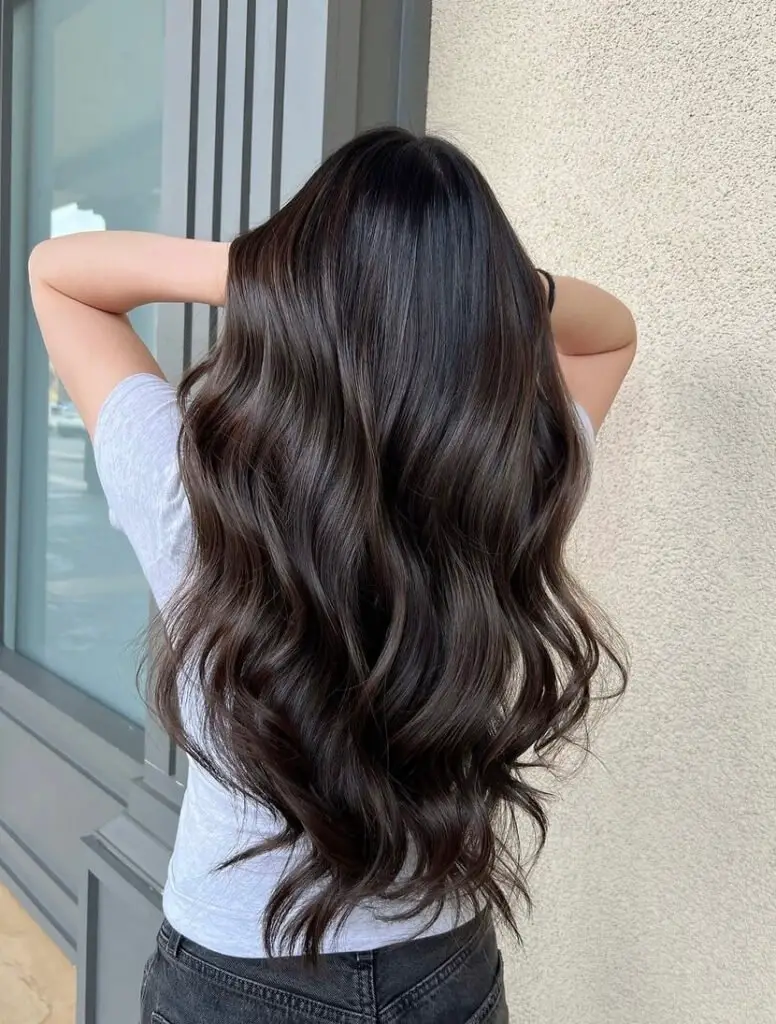
Have you ever wondered if the dimensional version is worth the extra salon time over the solid colour? Take the mid-back dimensional espresso with cool highlights vs. a flat solid espresso. The dimensional version has subtle cool-toned highlights that add movement and catch light. The solid is simpler, lower maintenance, and never grows out. But the dimensional looks richer in motion. If you want a shade that shifts in sunlight, go dimensional. If you want a no-brainer, solid wins. The dimensional espresso cool highlights require a touch-up every three months; the solid needs a gloss every eight.
Espresso Waves With Lighter Pieces
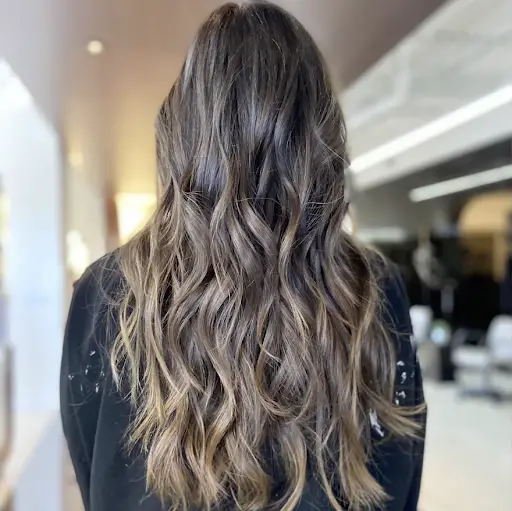
When I first saw this, my gut said “that’s dimensional without screaming ‘highlights.'” The espresso brown base sits deep, then subtle lighter brown pieces weave through the mid-lengths and ends. Long layers cut through wavy, medium-density hair to mid-back with a middle part, styled into loose waves. The espresso waves with lighter pieces feel intentional, not accidental.
The technique: those lighter brown pieces are hand-painted on a few selected strands—mostly around the face and through the middle layer, not dumped on the ends. This keeps the roots dark and the dimension soft. Because the base is deep espresso, the contrast is noticeable but not stark. The loose waves break up the color so the lighter pieces peek out from different angles, not in straight lines. That’s why it reads natural, not striped.
No Bangs Espresso Highlights Mid-Back Waves
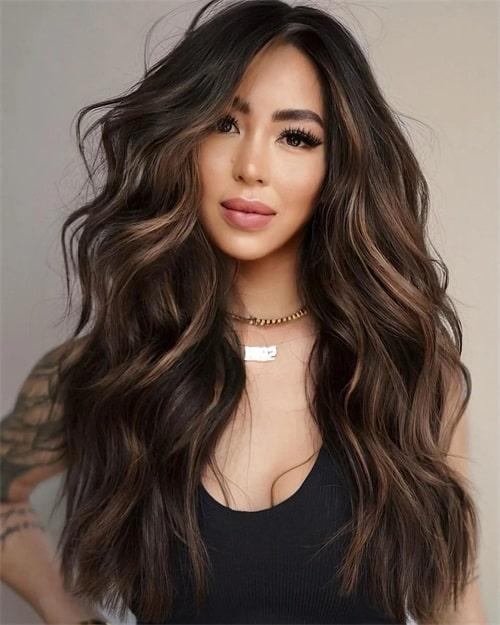
This dimension works best if your hair already has wave. Medium-density texture holds loose waves without collapsing, and the mid-back length gives enough weight to keep shape from puffing. The espresso highlights mid-back are subtle lighter brown highlights that add movement without full-head foils. Fine or pin-straight hair? The layers go flat by noon. Very coarse dense hair? The contrast might not show. Suits oval and heart faces best; round faces may find the middle part too widening.
Espresso Wavy With Subtle Highlights
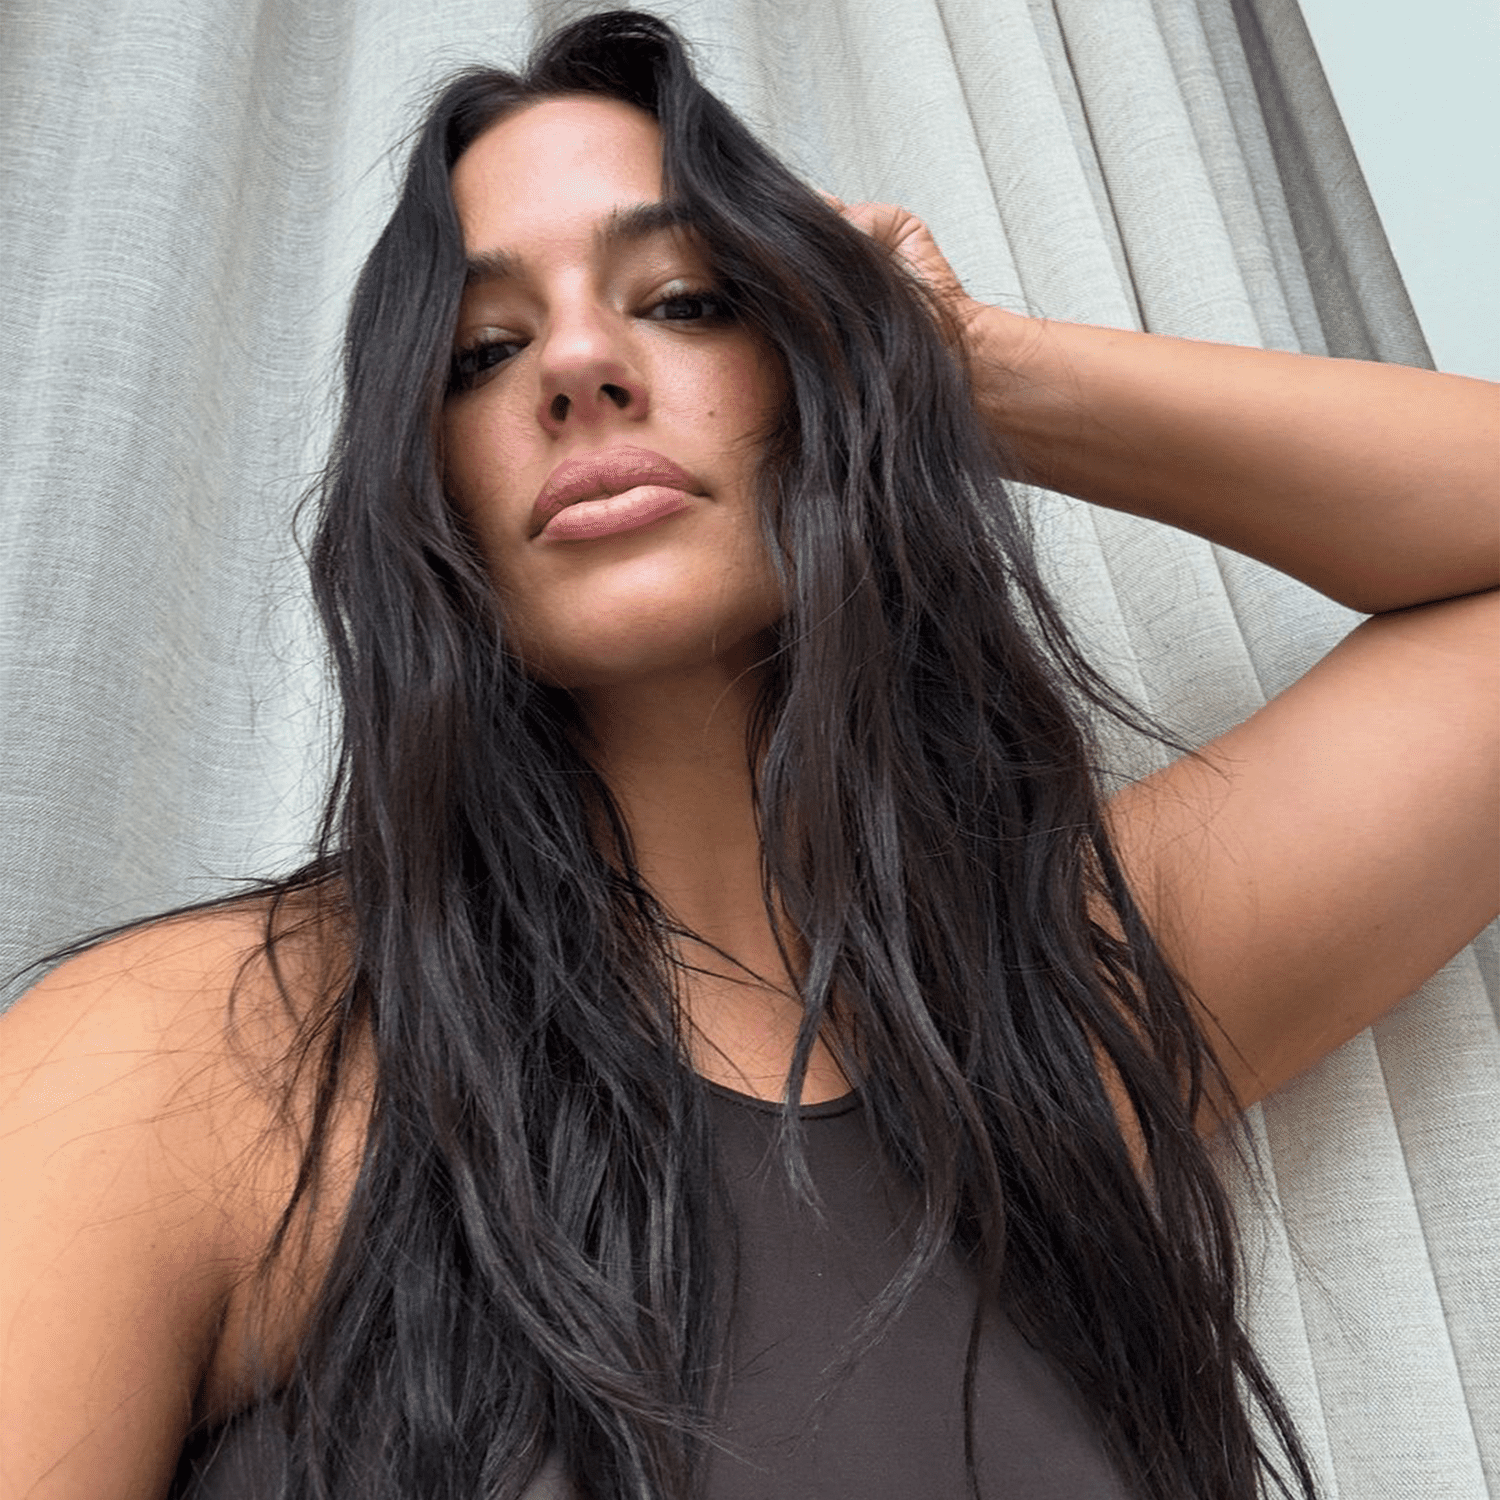
What makes a summer hair color feel like a vacation? This espresso wavy subtle highlights combination does exactly that: a rich espresso brown base with lighter brown highlights scattered through the mid-lengths and ends. The technique is soft and subtle, likely a balayage, so the grow-out is gradual and the tone stays warm enough to flatter sunkissed skin. Mid-back length gives enough weight to air-dried waves, and the layers let texture move without going frizzy. No bangs means one less thing to manage in humidity.
The wavy, thick texture here is the key: it holds the wave without product, and the lighter pieces catch the light when you turn your head. This is the color you book for a summer trip and forget about until October. It works from the plane to the pool to the dinner table, and it still looks fresh when you get home. The tone stays rich for at least three months before you need a touch-up. And the best part: it looks like you spent hours at the beach, not in a chair.
Sleek Straight Espresso Mid-Back
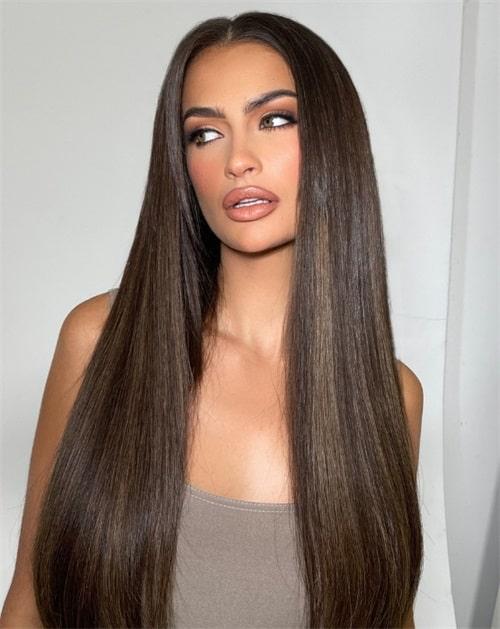
The technique for the sleek finish matters just as much. Fine, straight hair like this requires a blowout with a round brush to lock in tension, followed by a flat iron on low heat. One missed pass and the light catches the imperfection. The middle part means every strand is visible, so the cut has to be dead straight. This is a look that demands a professional eye for both the color and the cut. Book it, bring a photo, and let them handle the rest.
Espresso Ombre With Lighter Ends
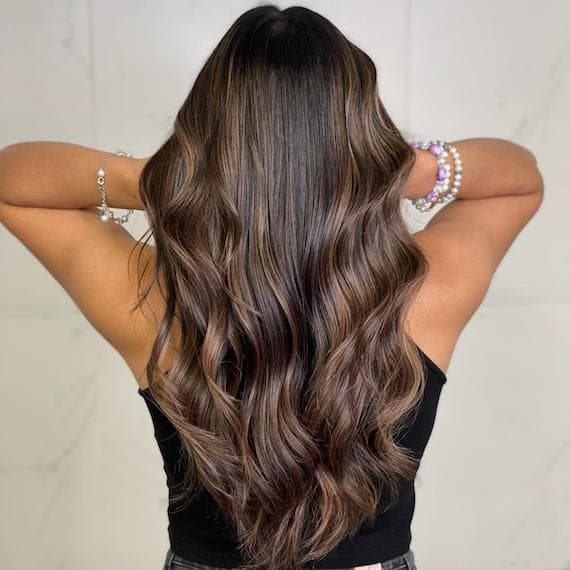
Ever wondered if an ombre can actually look refined and not like you forgot to book a touch-up for six months? The espresso ombre lighter ends here prove yes, it can. The technique is a subtle ombre effect that transitions from deep espresso at the roots to a lighter brown at the mid-back ends. The tone stays warm and dimensional, the texture is wavy and thick, so the colour lands softly rather than in harsh bands. Loose waves are the default styling here, minimal effort required. Trims every 8-10 weeks, but the ombre grows out gracefully, which means fewer colour appointments. A texturizing spray gives the waves shape without weighing them down.
This is the colour for anyone who wants dimension without a strict root schedule. It will not betray you at week six.
Layers Collarbone Ombre With Lighter Ends
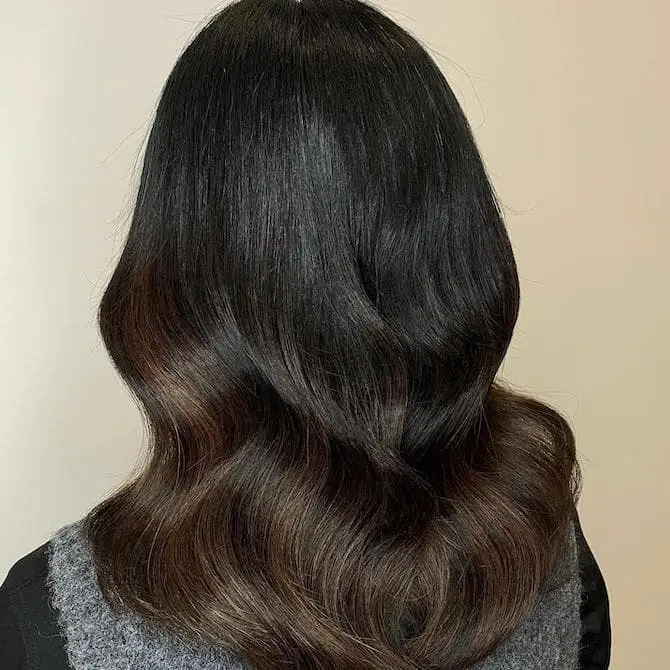
The collarbone ombre lighter ends caught me off guard. I expected a basic gradient, what I got was a deliberate build from deep espresso roots to lighter brown tips, the layers doing the work of making the transition feel soft rather than stamped on. The ombre effect here is not dramatic, it is a slow fade that keeps the base intact. The wavy, thick texture helps the colour land naturally, no harsh lines. Styling is minimal, loose waves with a texturizing spray, trims every 6-8 weeks. The colour grows out without demanding a salon visit every month. The technique is simple: your stylist lightens the ends gradually, keeping the root zone untouched.
Mid-Back Espresso Layers With Soft Curls
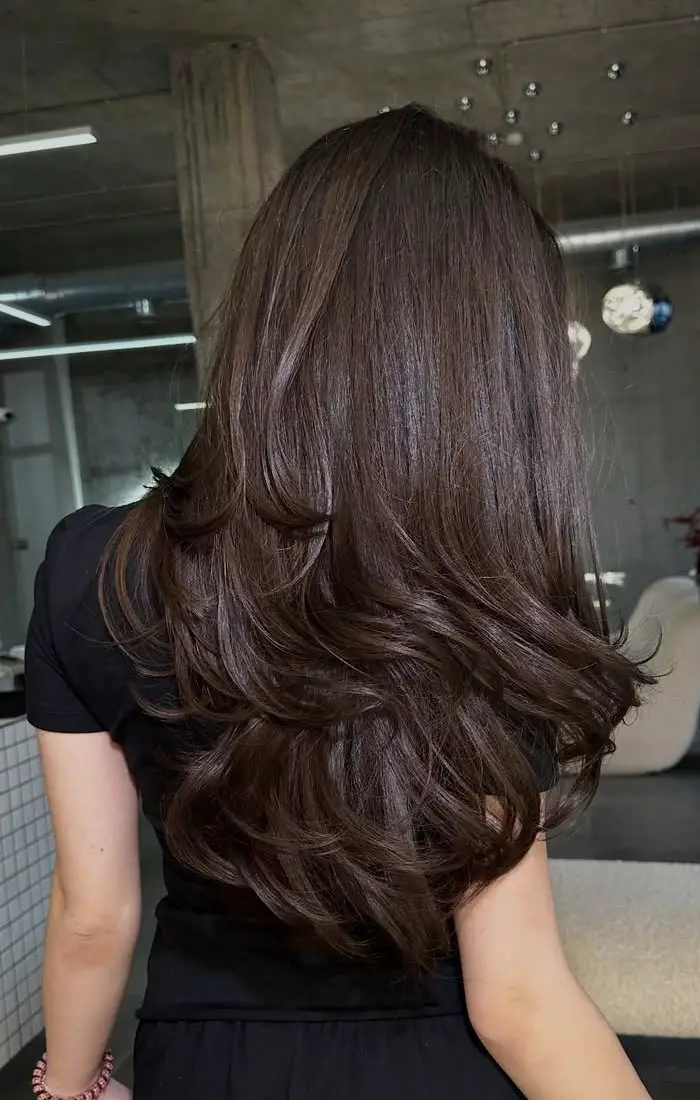
The espresso layers soft curls work best on thicker hair. I have fine hair, and this cut would eat it alive. The long layers are cut into mid-back length, the soft curls add volume without losing definition. The espresso brown is solid, no highlights, the tone is neutral and rich. The texture is wavy and thick, which means the curls hold shape without fighting gravity. A curling iron or wand is the tool here, plus a curl-defining cream and heat protectant. Do not over-brush the curls, they will separate and frizz. Trims every 8-10 weeks. If your hair is fine or low density, skip this one, the layers will look sparse. For thick hair that needs movement, this is the shape.
Voluminous Espresso Blowout
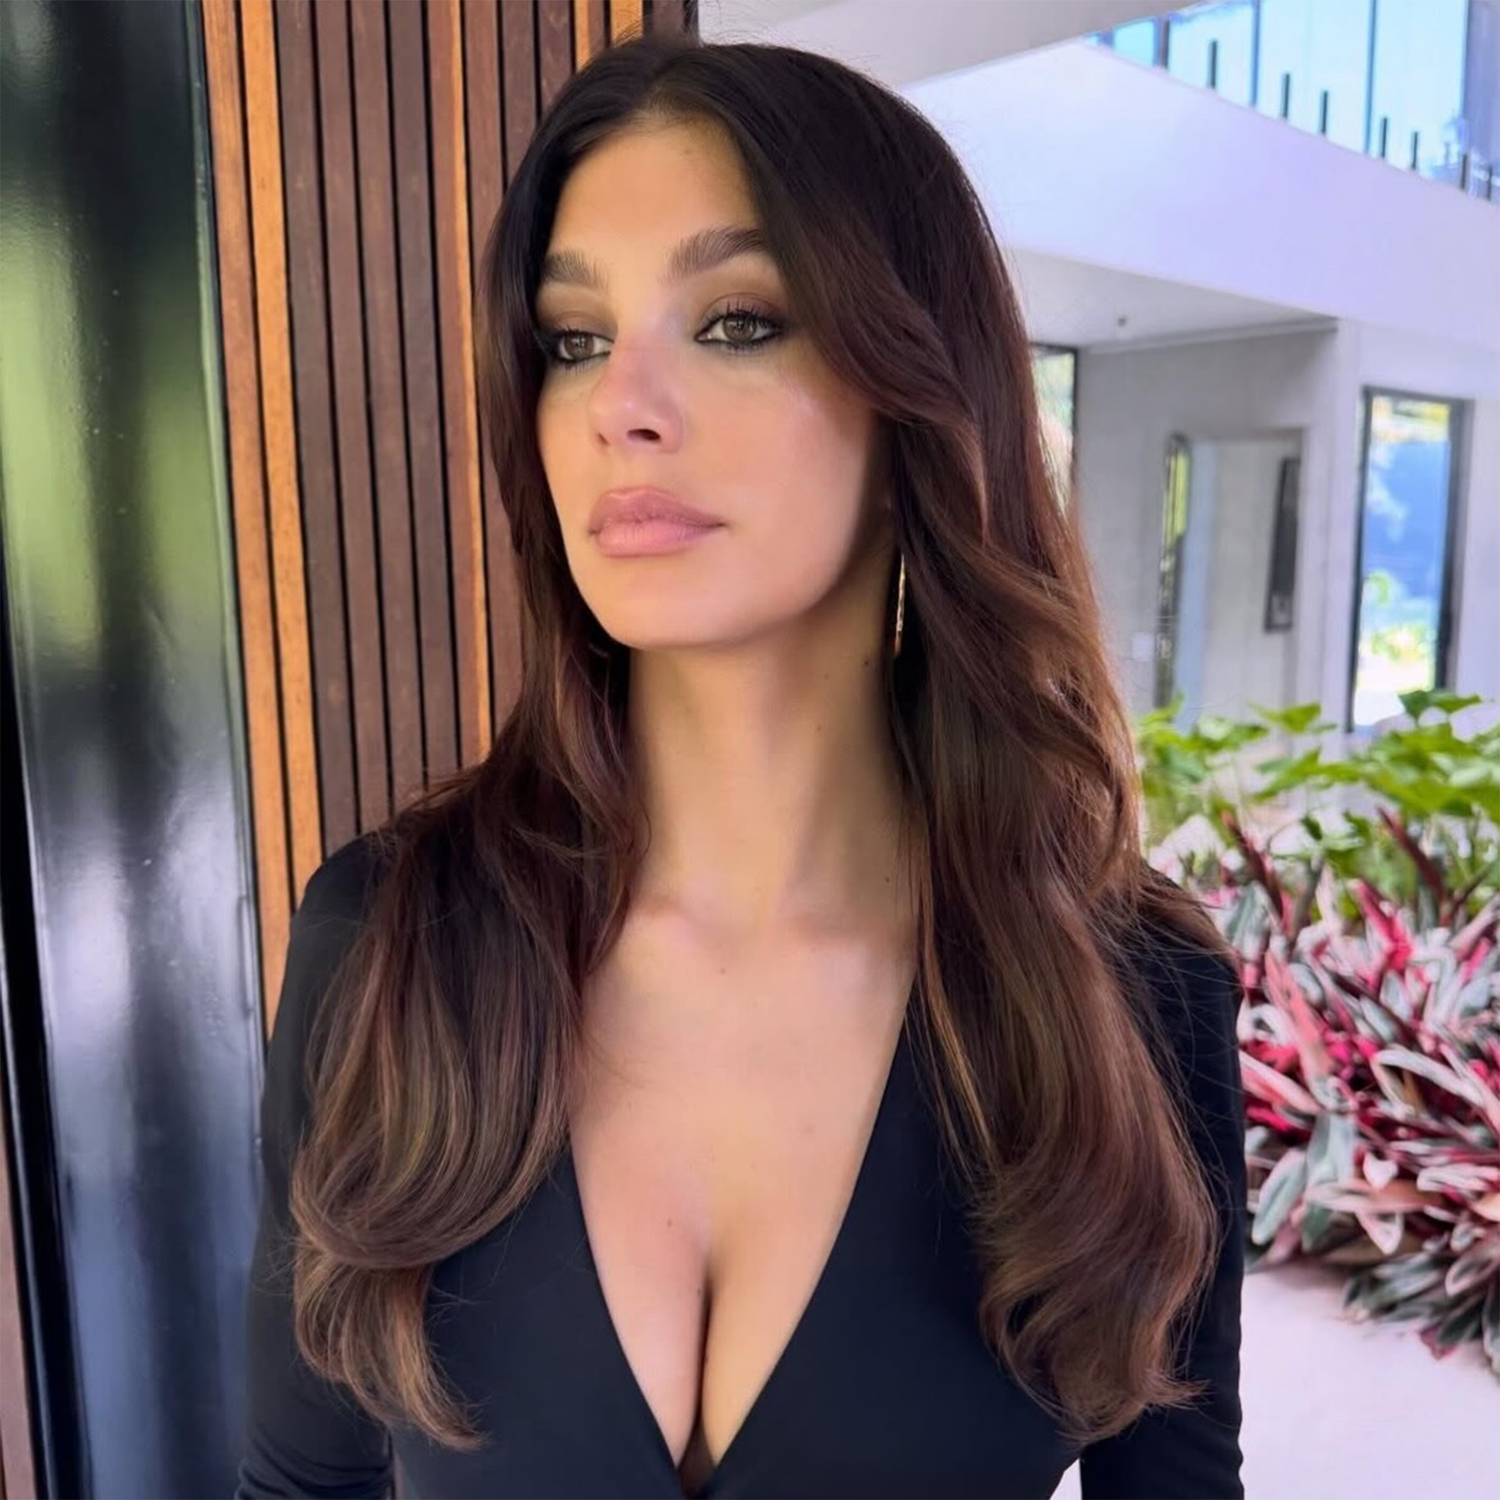
Is there a better autumn event colour than a voluminous espresso blowout? The deep rich espresso brown catches the low autumn light and holds it. The long layers are cut into mid-back length, the styling is a wavy blowout done with a round brush and volumizing products. The texture is wavy and thick, which means the volume actually stays past the first hour. A heat protectant is non-negotiable here. Over-brushing will flatten the lift, so set it and leave it. Trims every 8-10 weeks. This is the colour and style for a dinner, a wedding, an evening where you want the hair to arrive before you do. It reads polished without trying too hard.
Layers Solid Espresso Mid-Back Waves
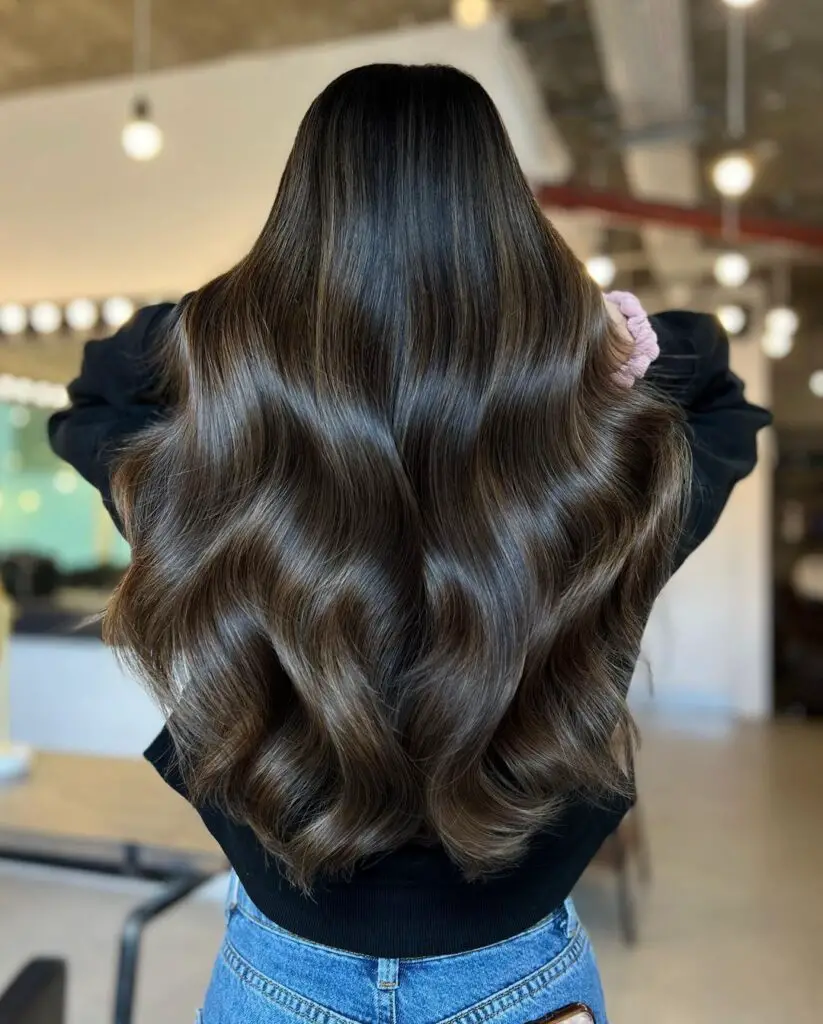
I spent three years trying to get a solid espresso brown that didn’t look patchy. This solid espresso mid-back is exactly what I wanted: even, rich, with a lustrous espresso brown finish that shines without being brassy. The technique is a single-process colour applied all over, no highlights. The tone is cool and even, and the thick, wavy texture holds the loose waves. The colour holds its depth for about six weeks before the roots show, and the layers keep the waves from falling flat by day’s end.
Deep Solid Espresso Waves
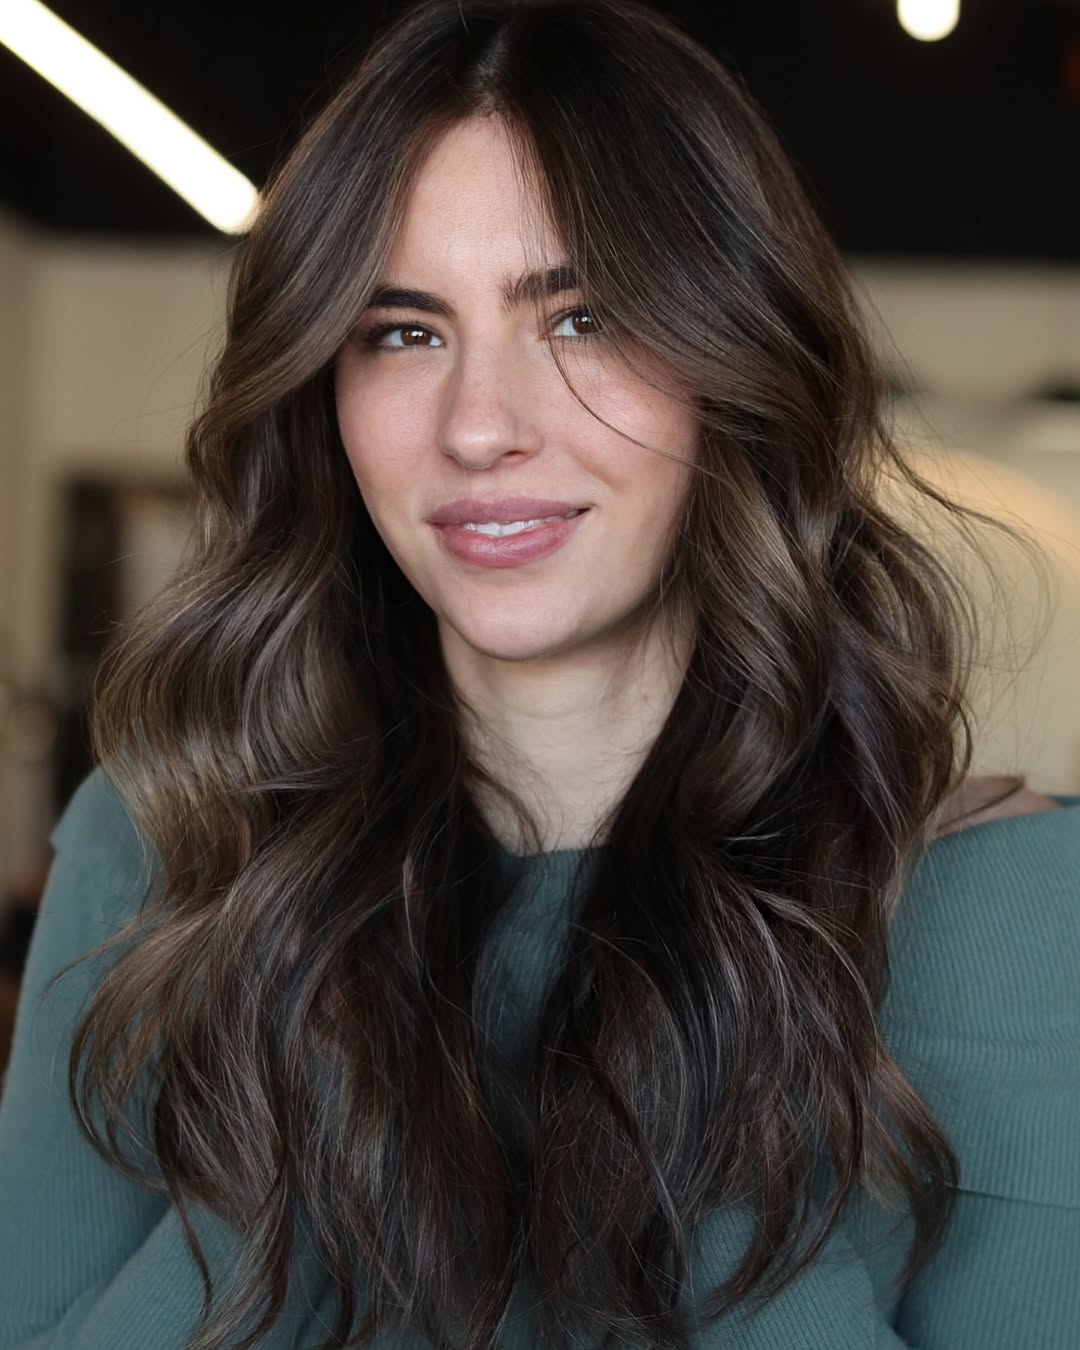
How much time do you have in the morning? These deep solid espresso waves are not a wash-and-go style. The loose waves require a blow dry with a round brush to get that polished, voluminous look. The solid espresso brown colour is even and rich, so no worry about highlights fading, but the styling is the real commitment. The thick, wavy texture helps hold the shape, but it still takes technique.
The reality is that these waves don’t survive a night’s sleep. You will need to rewet and restyle each morning. The key is to section the hair and blow dry each section from root to tip, rolling the brush under at the ends. If you have fine hair, these waves might fall flat by noon. The thick texture in the photo is ideal because it holds the curl. For finer hair, you would need more product or a tighter curl. The layers help the wave fall naturally, but they also mean you can’t skip the blowout. Expect 15 minutes of styling daily, minimum.
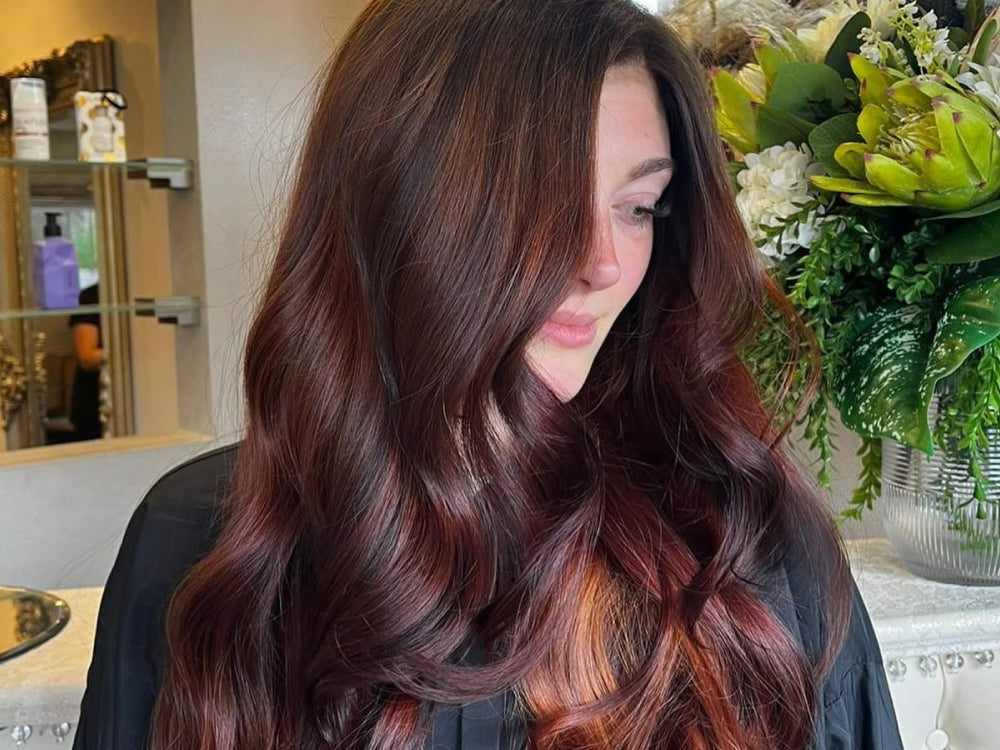
Espresso Waves With Reddish Undertones
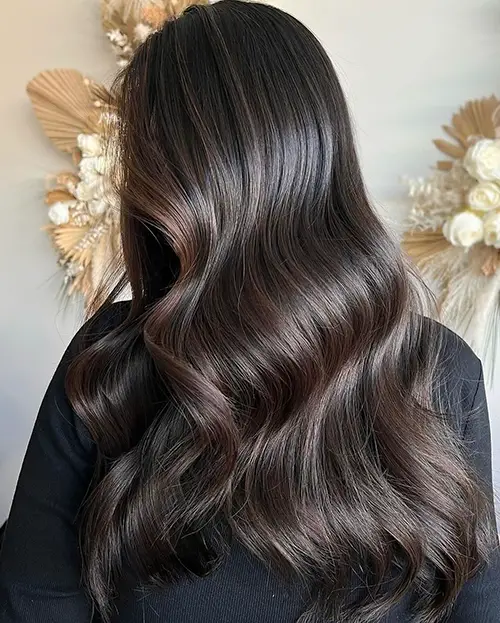
I saw this and immediately thought of autumn. The deep espresso brown base has subtle reddish undertones that catch the light, giving it warmth without going full auburn. The espresso waves reddish undertones create a warmth that is ideal for fall. The tone is balanced so it doesn’t read brassy, just rich and dimensional. The mid-back length with loose waves shows off the colour shift as the light hits. The thick, wavy texture helps the undertones catch light from different angles.
The technique involves a red-toned gloss applied over the espresso base. The stylist mixes a small amount of red pigment into the gloss to create a subtle warmth that only shows in certain light. This is not a permanent dye; it fades gradually over 4-6 weeks, which is perfect for the seasonal transition from summer to fall. The warmth makes the colour feel alive, not flat, and it pairs well with the warm tones of autumn. This colour lands best in September and October, when the light is golden and the leaves are turning.
Espresso Curls With Highlight Dimension
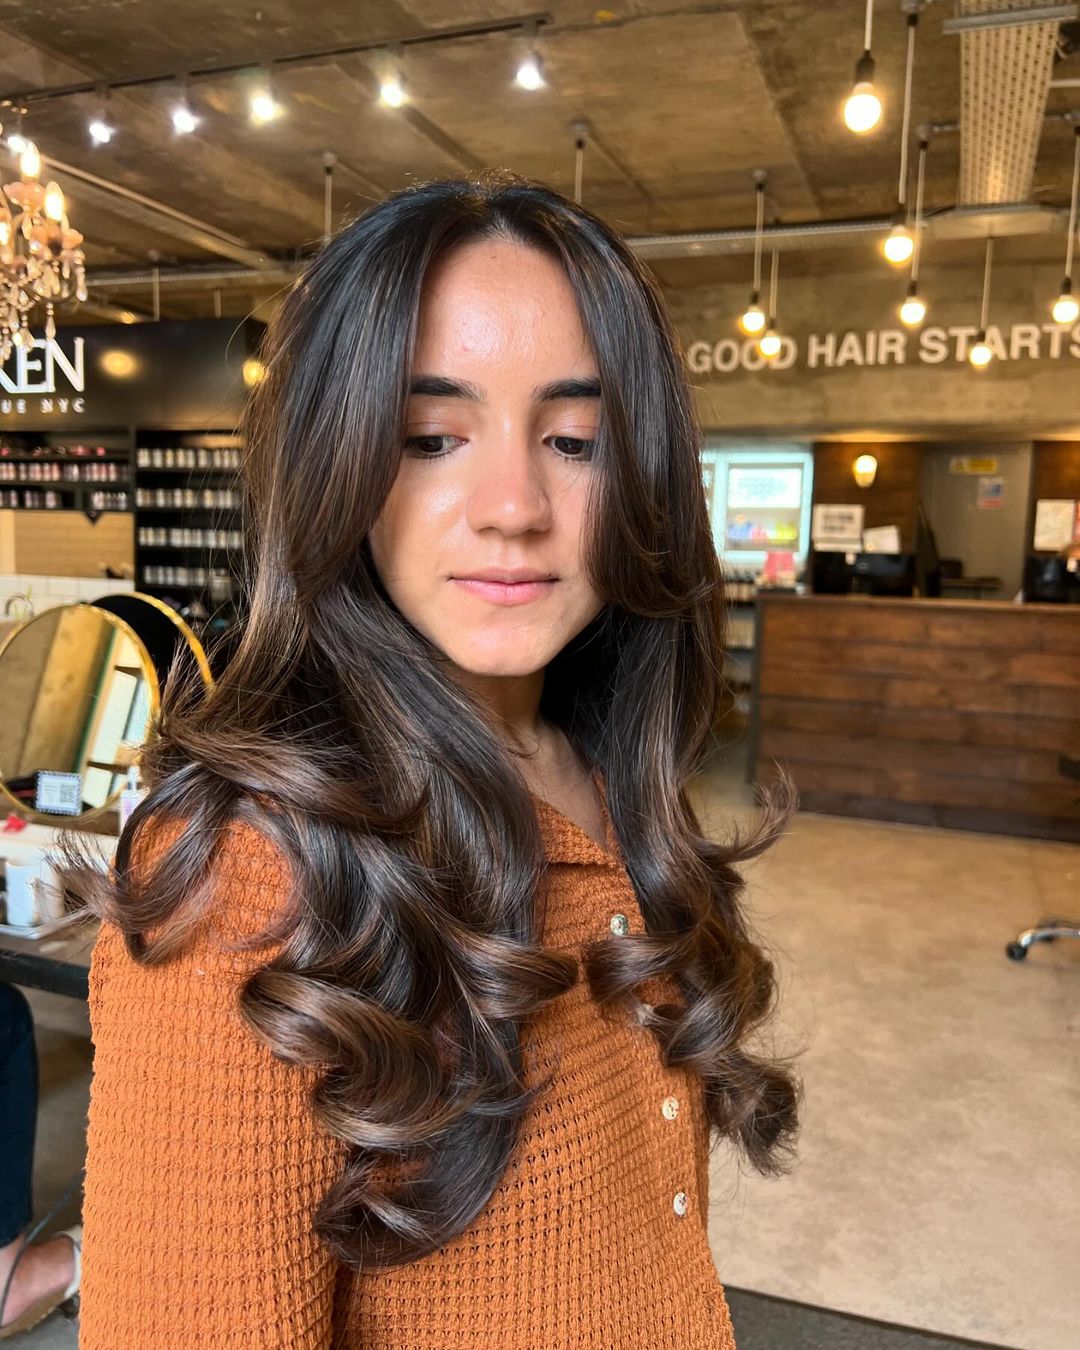
Why do the same highlights look completely different on curls versus straight hair? Because curls catch light from every angle, while straight hair bounces it back in one direction. These espresso curls highlight dimension are built with subtle lighter brown pieces woven through face-framing layers, and on this wavy, thick texture, each curve reveals a new stripe of color. The technique is subtle, likely a hand-painted balayage, so the lighter pieces land where the hair bends naturally.
On straight hair, those same highlights might read as a few thin streaks. Here, they create movement and depth. The mid-back length gives enough canvas for the dimension to stretch from root to end, and the layers ensure the lighter pieces hit the cheekbones and collar. The tone stays warm and rich, so the contrast is soft, not brassy. This is the argument for highlights on curls: you get more mileage out of every lift.
Mid-Back Espresso Volume With Highlight Dimension
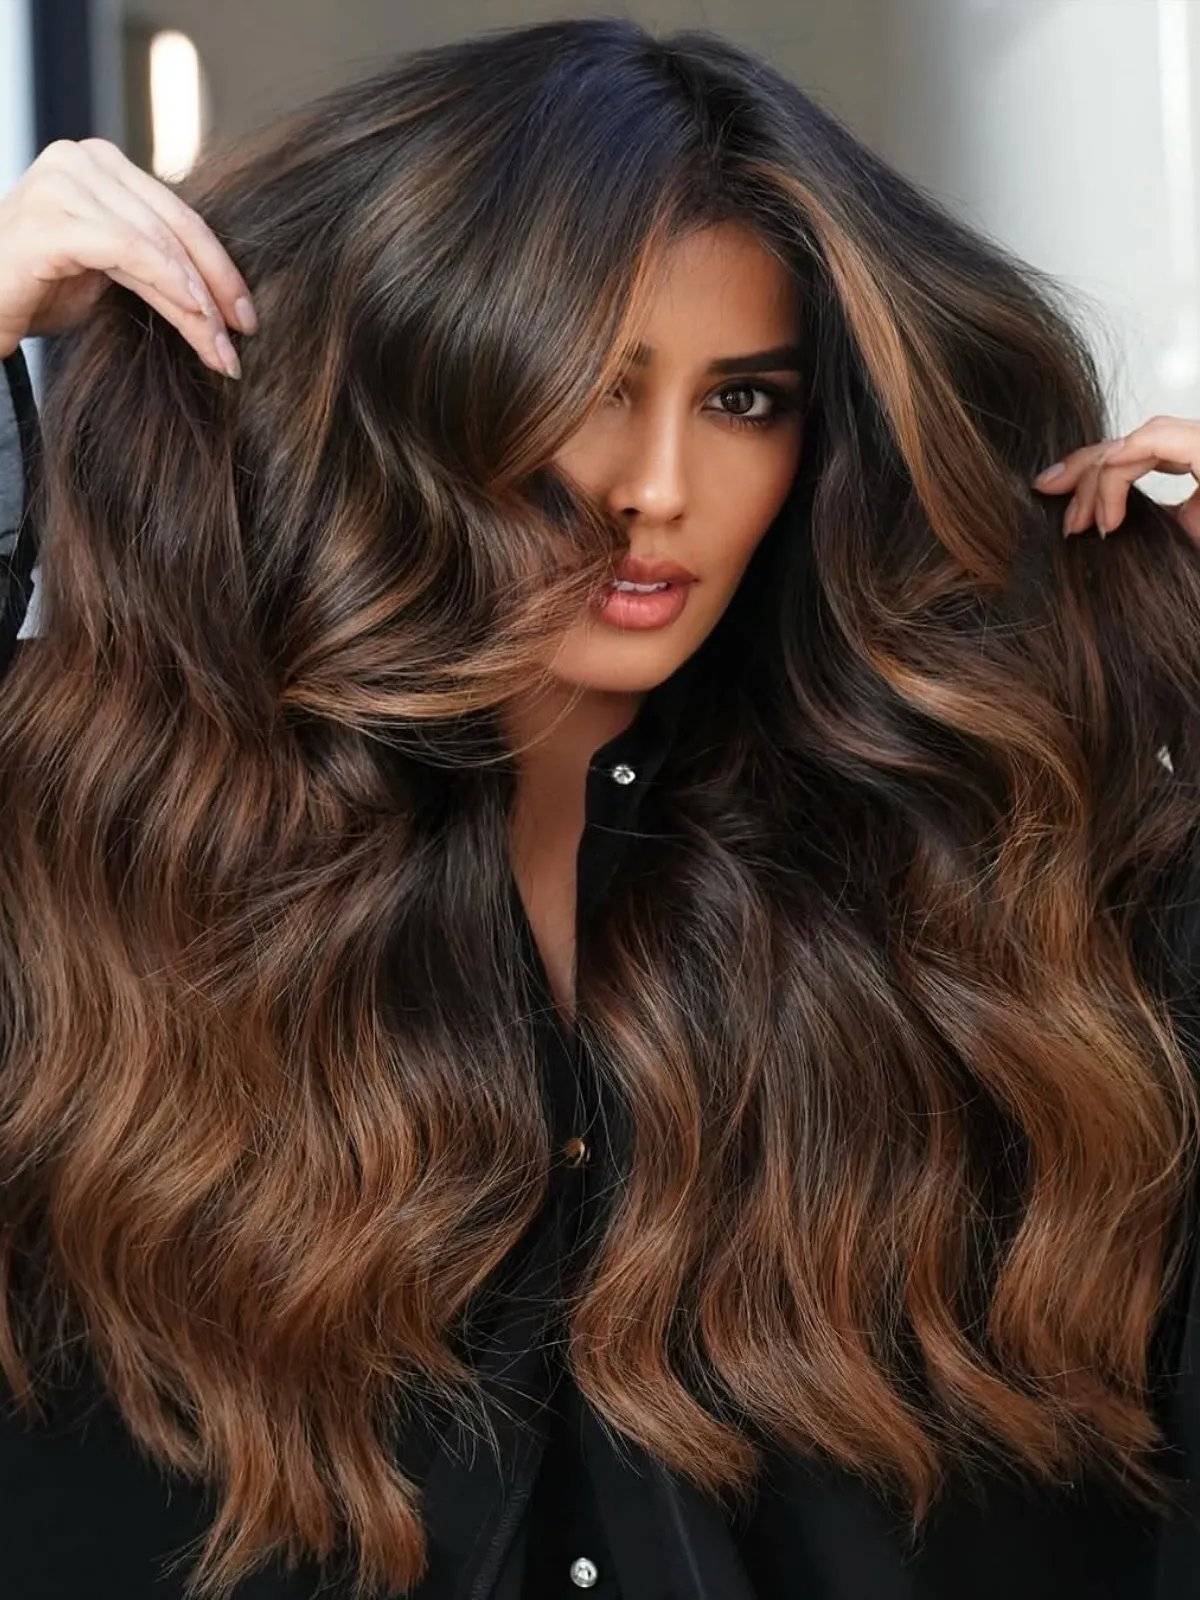
I have a confession: I wasn’t sure thick, wavy hair could handle the combo of volume and dimension without looking overcrowded. This mid-back cut with long layers and a dark espresso base punctuated by lighter brown highlights proves me wrong — the side part lifts the crown and the lighter pieces catch light without making the hair feel thinner.
The espresso volume highlight dimension holds up best when you rough-dry the roots and avoid brushing the wave. By day three the blowout sinks, but the colour still reads dimensional because the highlights are placed diagonally through the layers. Trims at eight weeks keep the shape from sagging, and a refresh every four months stops the lighter brown highlights from going brassy. For thick wavy hair that needs structure, this setup rewards the effort.
Rich Espresso Mid-Back Blowout
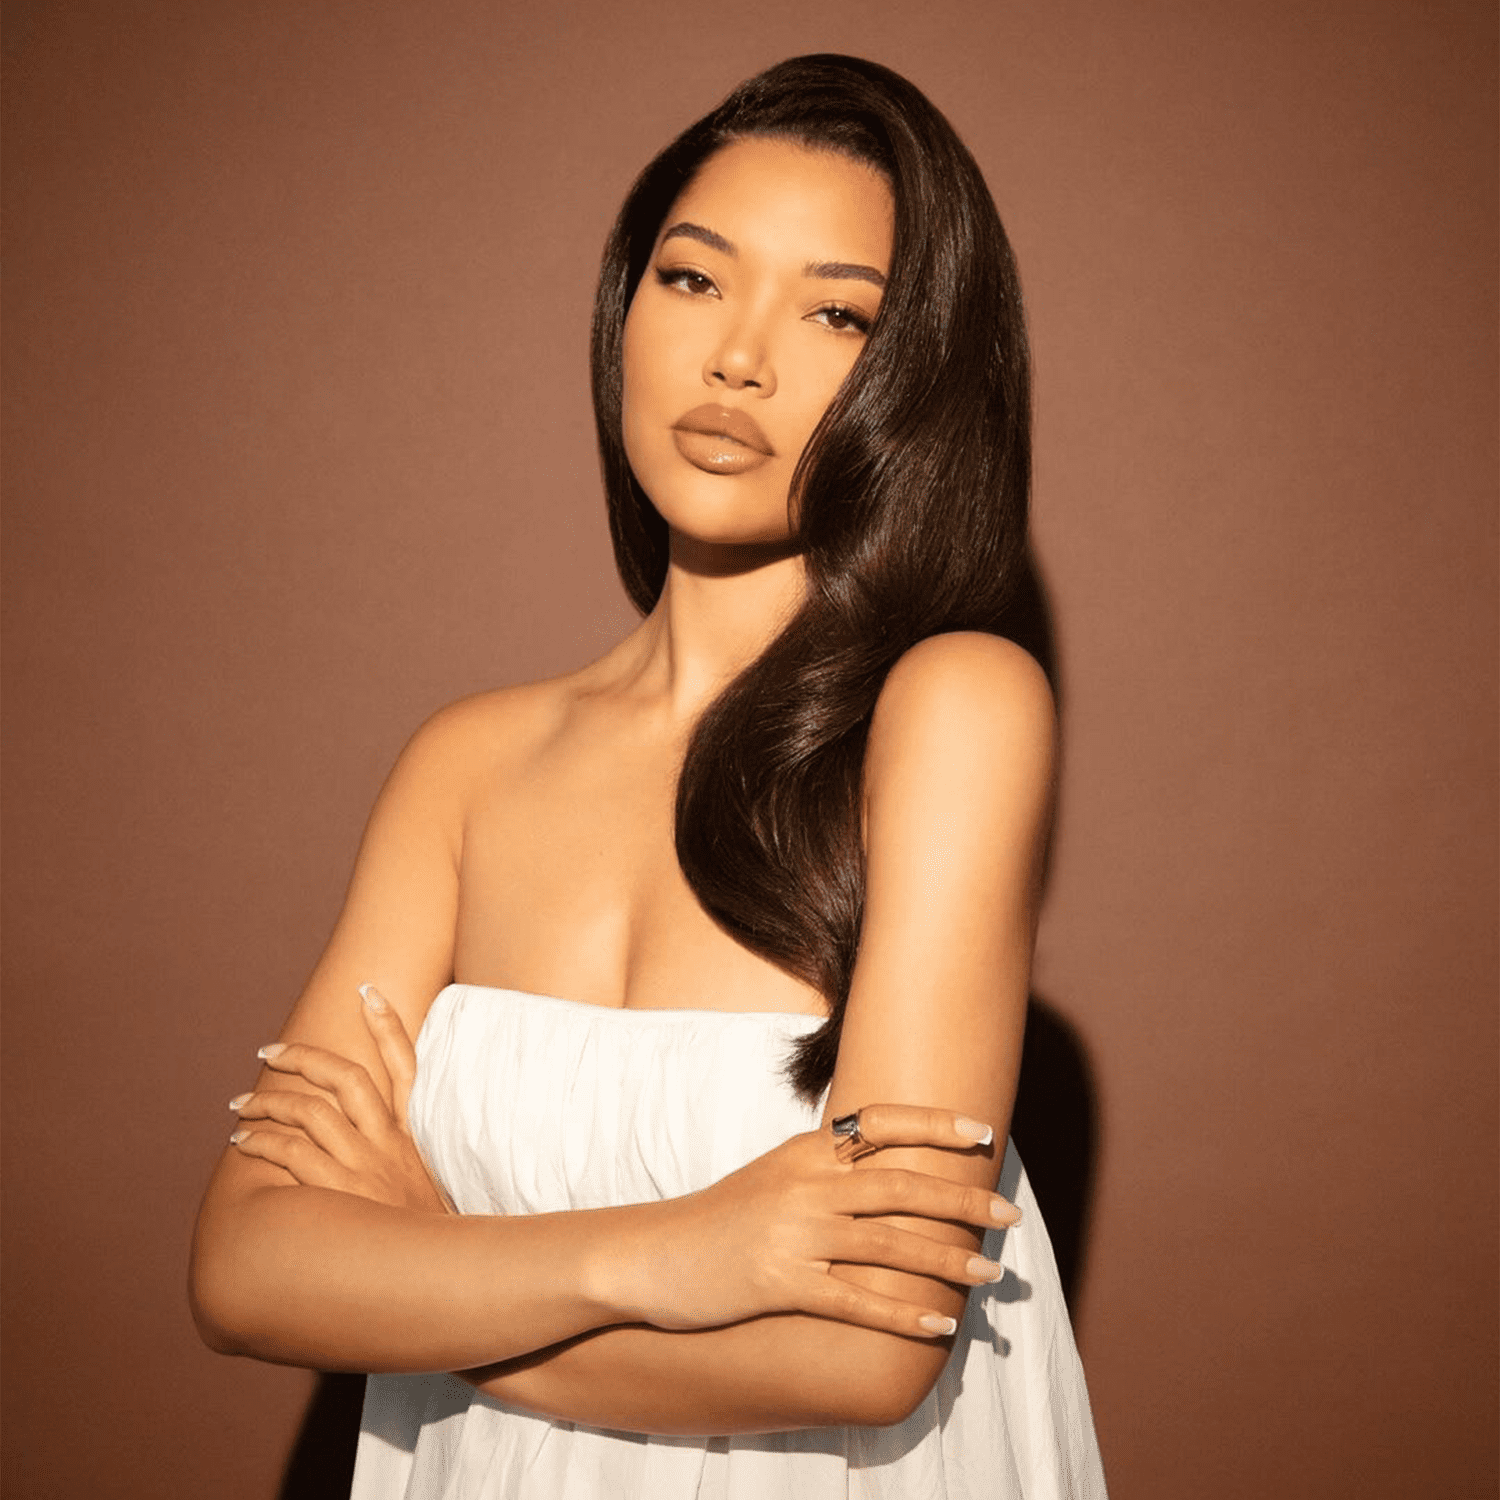
Now that is how you do a rich espresso mid-back blowout. The deep rich espresso brown shade is solid from root to end, no variation, and that is exactly the point: the colour reads expensive because it lets the wave do the talking. With a round brush, you wrap each section away from the face, hold the dryer on medium heat, and let the hair cool in the brush before releasing. The result is a smooth wave that holds its shape, not a curl that drops by lunch. The key is tension: pull the section taut as you dry, then blast cool air for ten seconds. On thick, wavy texture, the blowout lasts two days if you sleep on a silk pillowcase.
Final Thoughts
All 34 in one article, and I still think the blunt bob wins for grow-out. But the piecey pixie is the one I will book next. I never thought I would say this about a single-process brown, but espresso might be the quietest power move I have tried.